Key Takeaways
- RetroArch is a powerful emulator with a few necessary setup steps.
- Emulator cores in RetroArch may require BIOS files for optimal performance, which can be easily placed in the system folder.
- Utilize specific steps to set up a ROMs directory for easy game access, scan directories to create a beautiful game library, and fine-tune the experience.
RetroArch has finally hit the Apple App Store. However, if you have gone ahead and downloaded it, you might have quickly found yourself a little bit lost trying to use the app. Especially if you’ve only used simpler alternatives on the App Store, such as Delta. But don’t let that deter you. Beneath the somewhat clunky user interface of RetroArch is one of the best emulators available overall. It’s also currently your best option on the App Store for emulating Nintendo 64 or original PlayStation games.
Though the UI may trick you into thinking RetroArch is a complicated emulator that takes a ton of set up to use, it’s actually very simple. You just need to know your way around. With a few simple steps and a couple of tips, you’ll be able to use RetroArch to its fullest potential in no time.
RetroArch
RetroArch is a free, ad-free, open source, and cross platform frontend/framework for emulators, game engines, video games, media players, and other applications. Supported systems come in the form of libretro cores.
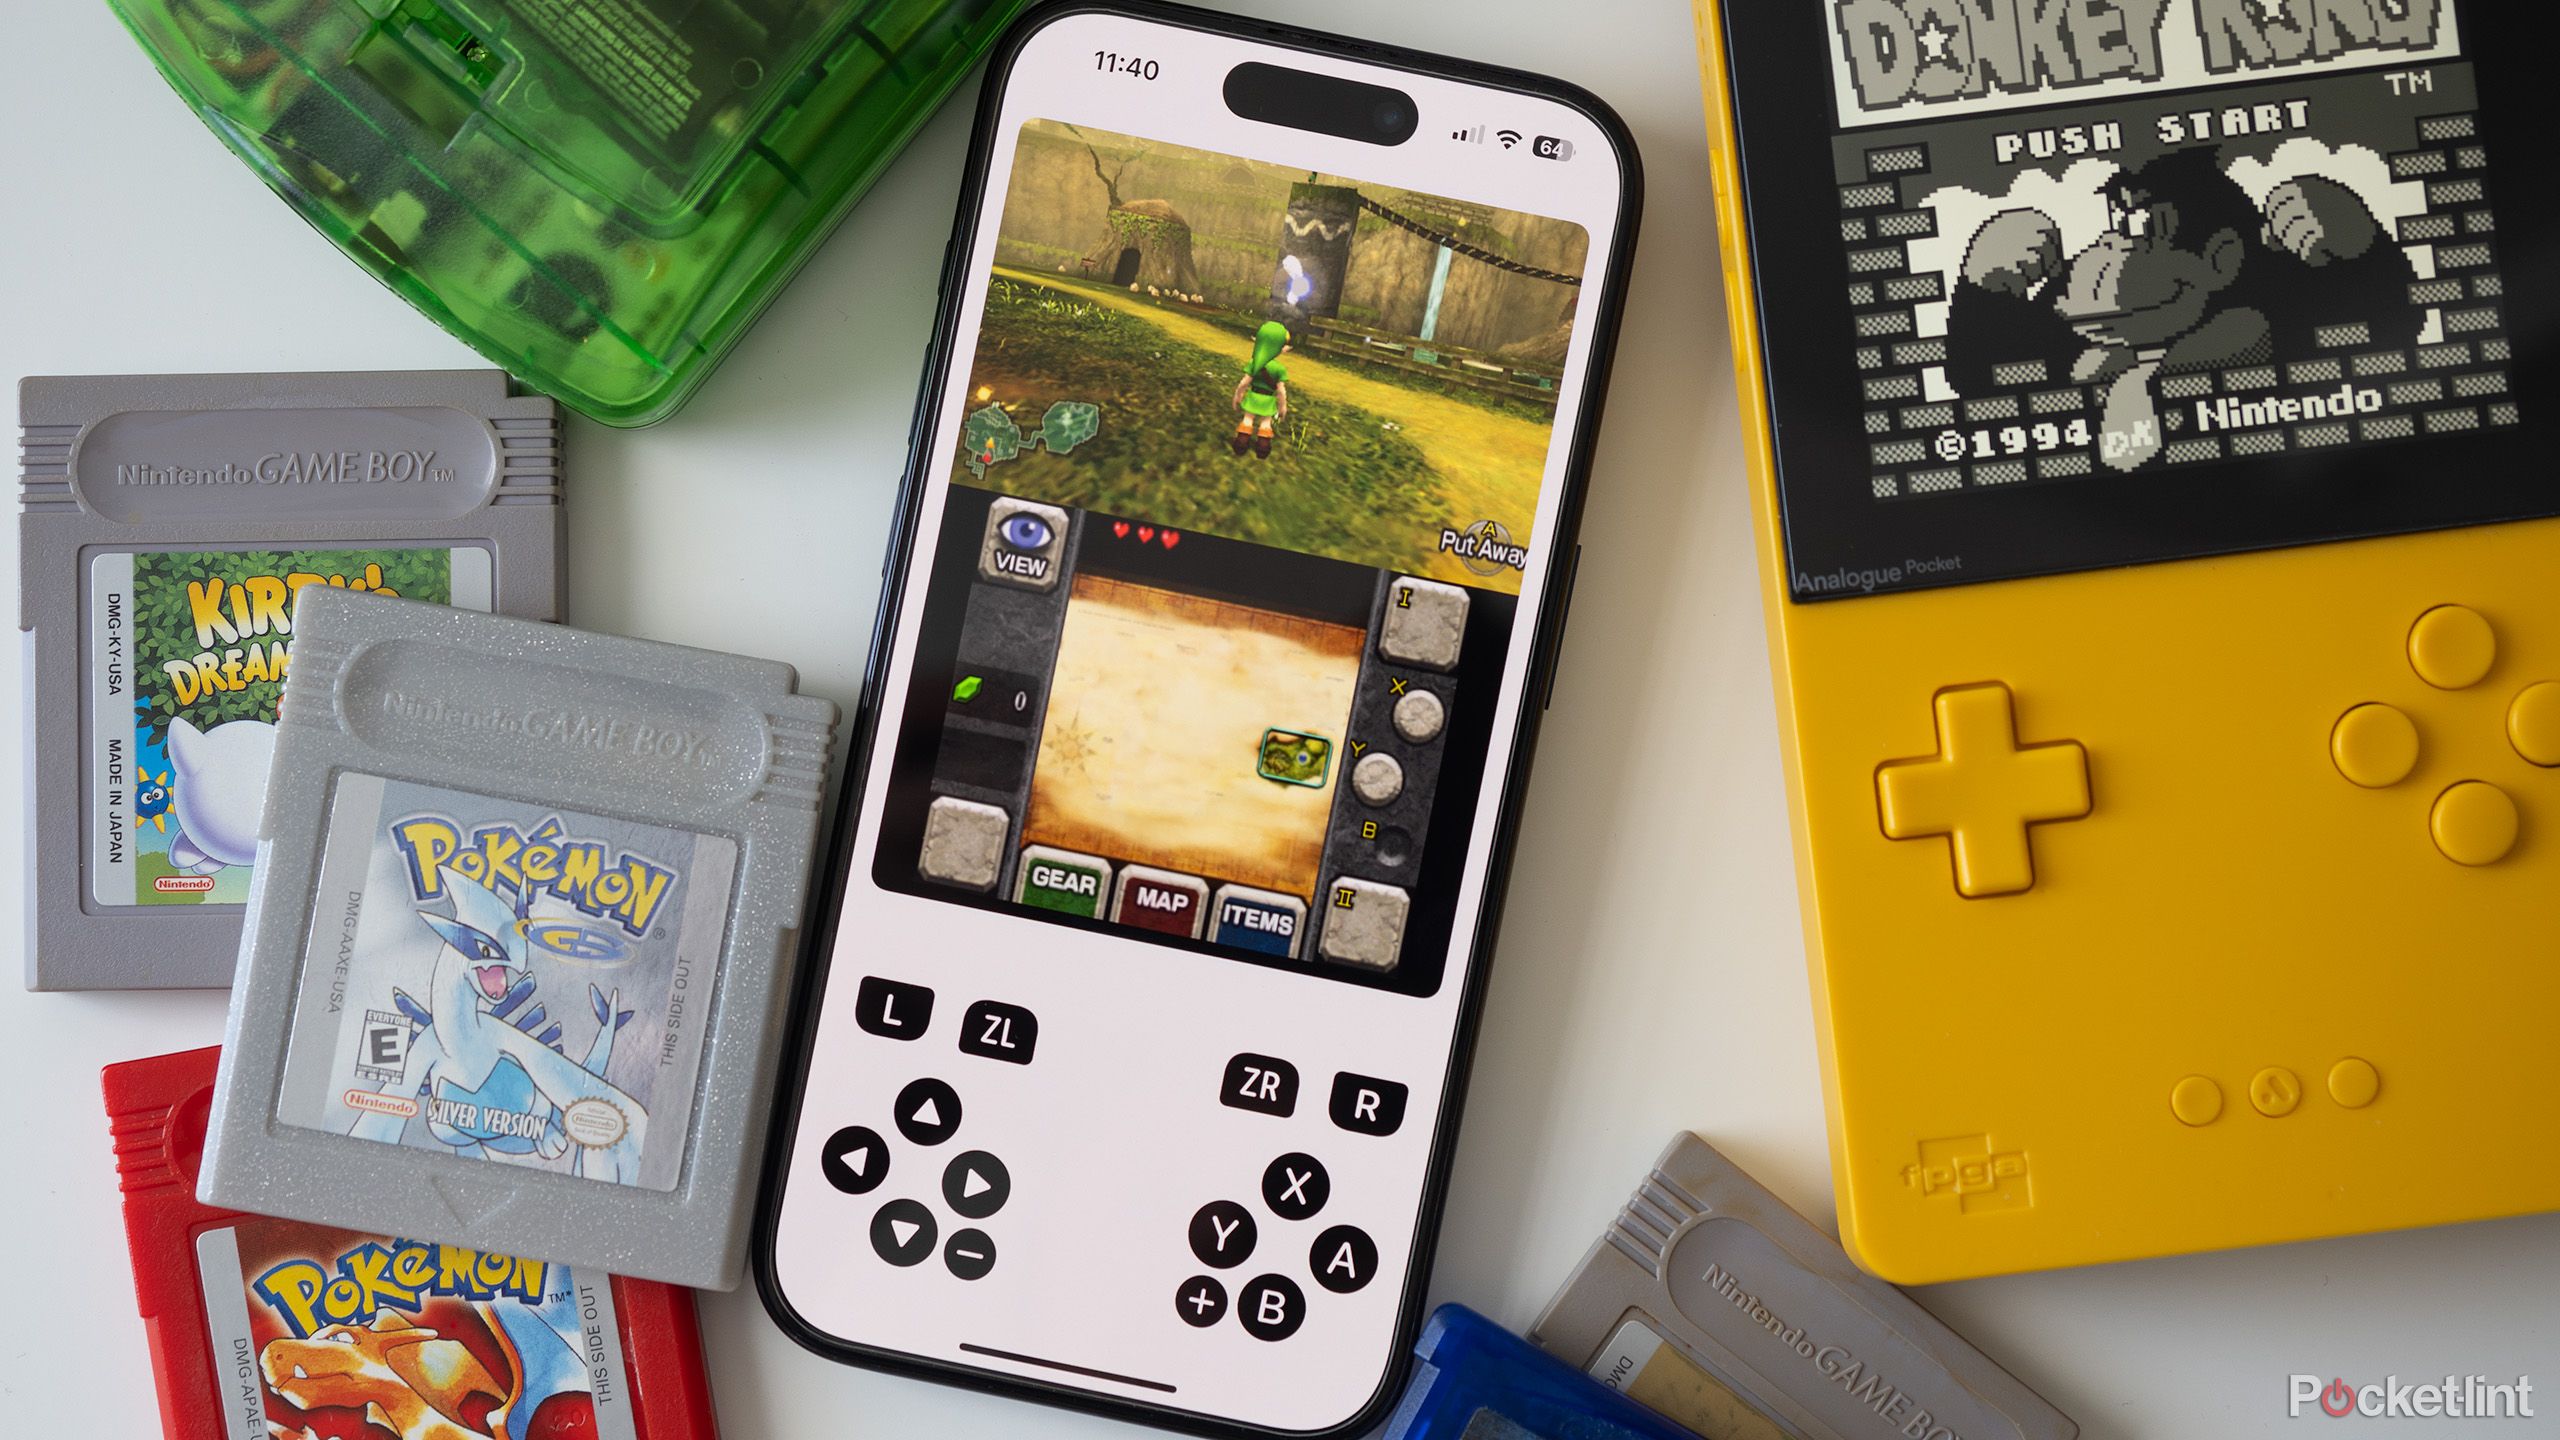
How to play Nintendo 3DS games on your iPhone with Folium
If you’re willing to deal with a few issues, it’s now possible to play Nintendo 3DS games on your iPhone.
First steps when using RetroArch
Before anything else, give this a try
When you first download RetroArch, there are a few things you should do before doing anything else. The first thing you should do is update everything you can within the app. And that doesn’t just mean making sure it’s up-to-date in the App Store, there are actually a couple of steps to take within RetroArch.
- Open RetroArch.
- Tap Online Updater.
- Tap all seven update options on the page.
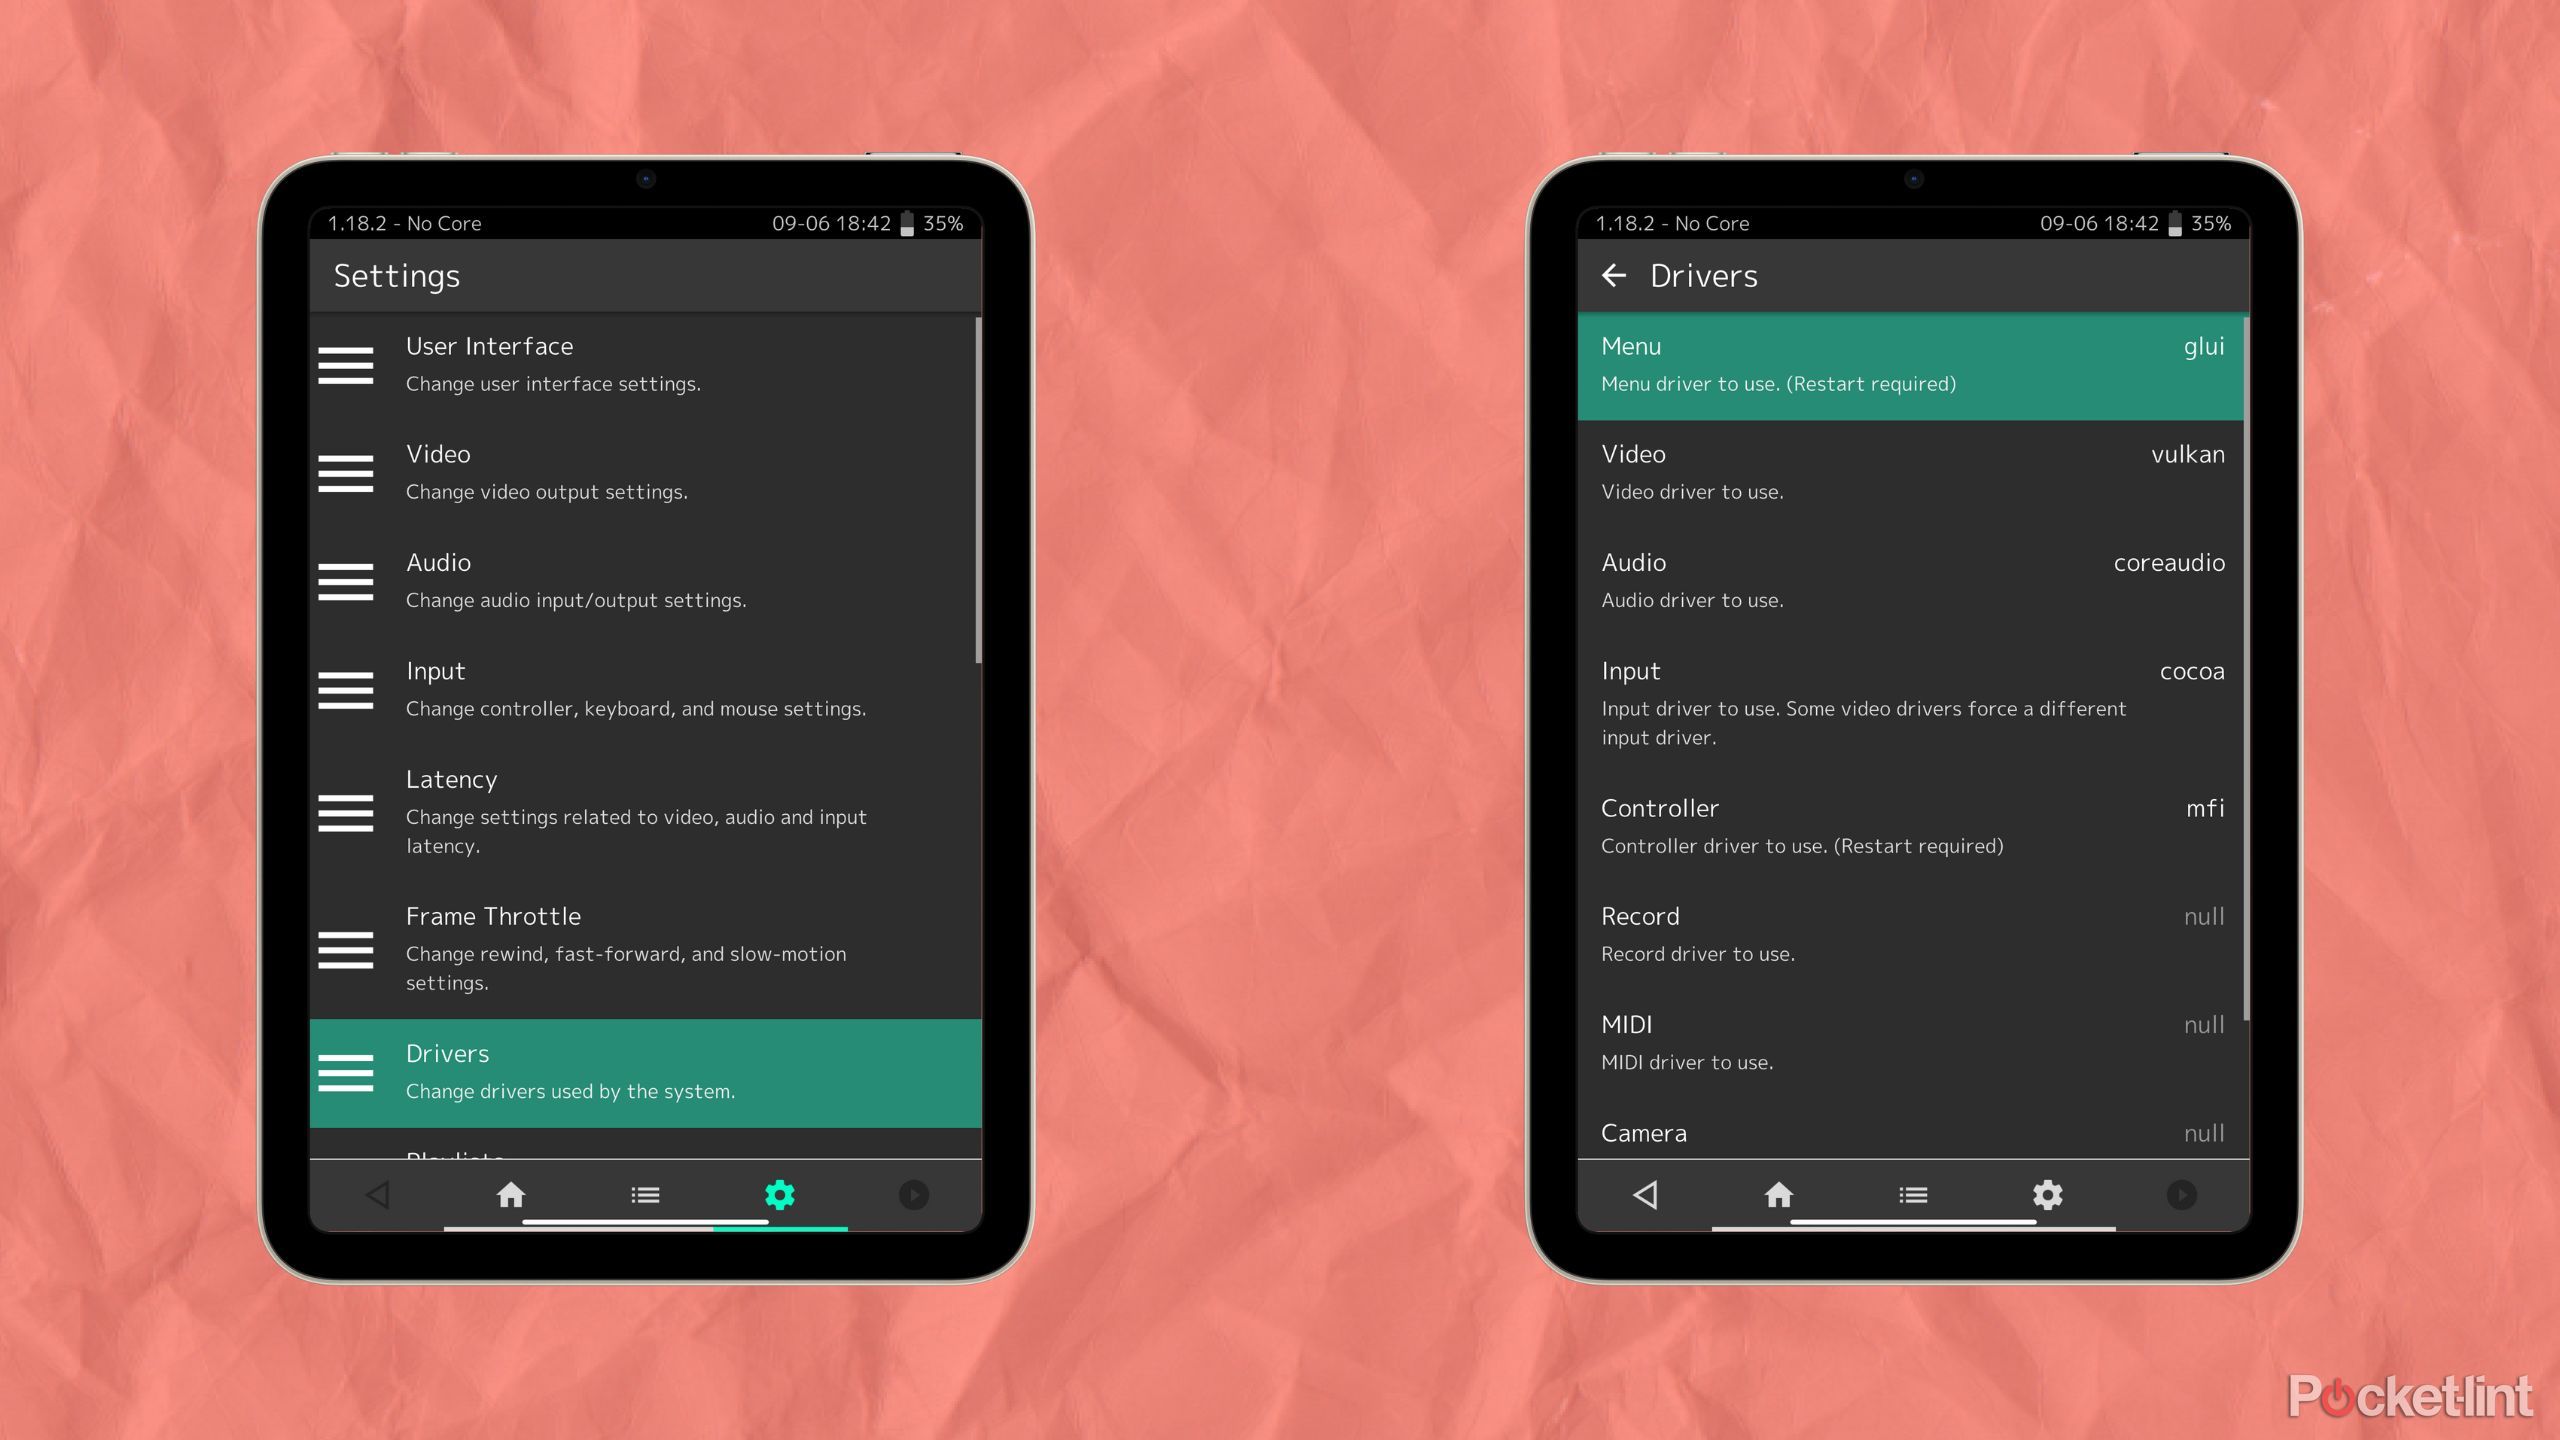
And just like that, you’ll have all the necessary updates downloaded. Once all of them are done, you can then move on to choosing the appearance of the app. By default, RetroArch will launch its GLUI interface. While this interface is nice for use with a touchscreen, if you’d prefer something a little less rough around the edges, or would just care for something that will work better with a controller, you do have some options.
How to change RetroArch’s interface:
- Open RetroArch.
- Navigate to Settings.
- Select Drivers.
- Select Menu.
Once you’ve made it to this menu, you’ll have four options to choose from:
- GLUI: The GLUI driver is the default mobile experience, and while appealing for being laid out with a touchscreen in mind, isn’t ideal for much else.
- Ozone: The Ozone driver will look familiar to anyone that has used RetroArch on their computer, as it is the default menu driver on desktop.
- RGUI: The RGUI driver gives an experience that looks much more like a terminal, and is by far the most unappealing of the bunch.
- XMB: The XMB option is modeled after the XMB UI of the PlayStation 3’s home screen.
Each of these interfaces offers a very different flavor of RetroArch. For those that will only be using their touch screen, it’s probably best to stick with GLUI. If you’re going to mainly be using a controller, Ozone and XMB will give the best experience.
One last tweak you’ll want to make if you’re planning to primarily use a controller with RetroArch is setting up a menu hotkey on your controller. This will allow you to access the RetroArch menu from your controller in the middle of emulating a game.
- Open RetroArch
- Navigate to the Settings tab
- Select Input.
- Select Hotkeys.
- Select Menu Toggle (Controller Combo).
Once the Menu Toggle option is enabled, you’ll be given a list of controller button combinations you can press to open the RetroArch menu during gameplay. While this isn’t essential, it will give you access to quick resetting, save states, and other emulation settings.
5 classic PlayStation games to emulate on your iPhone
With PlayStation 1 emulators now on the Apple App Store, it’s time to revisit some classics.
Placing necessary BIOS files on RetroArch
Make sure that when you open a game, it’s going to run correctly
Some emulators aren’t so simple as to work with no additional steps. If you’ve used Delta, you’ll already be familiar with the fact that it requires you to have Nintendo DS BIOS files on hand in order to emulate Nintendo DS games. In RetroArch, there are a few emulator cores that will need BIOS files in place to actually function as intended.
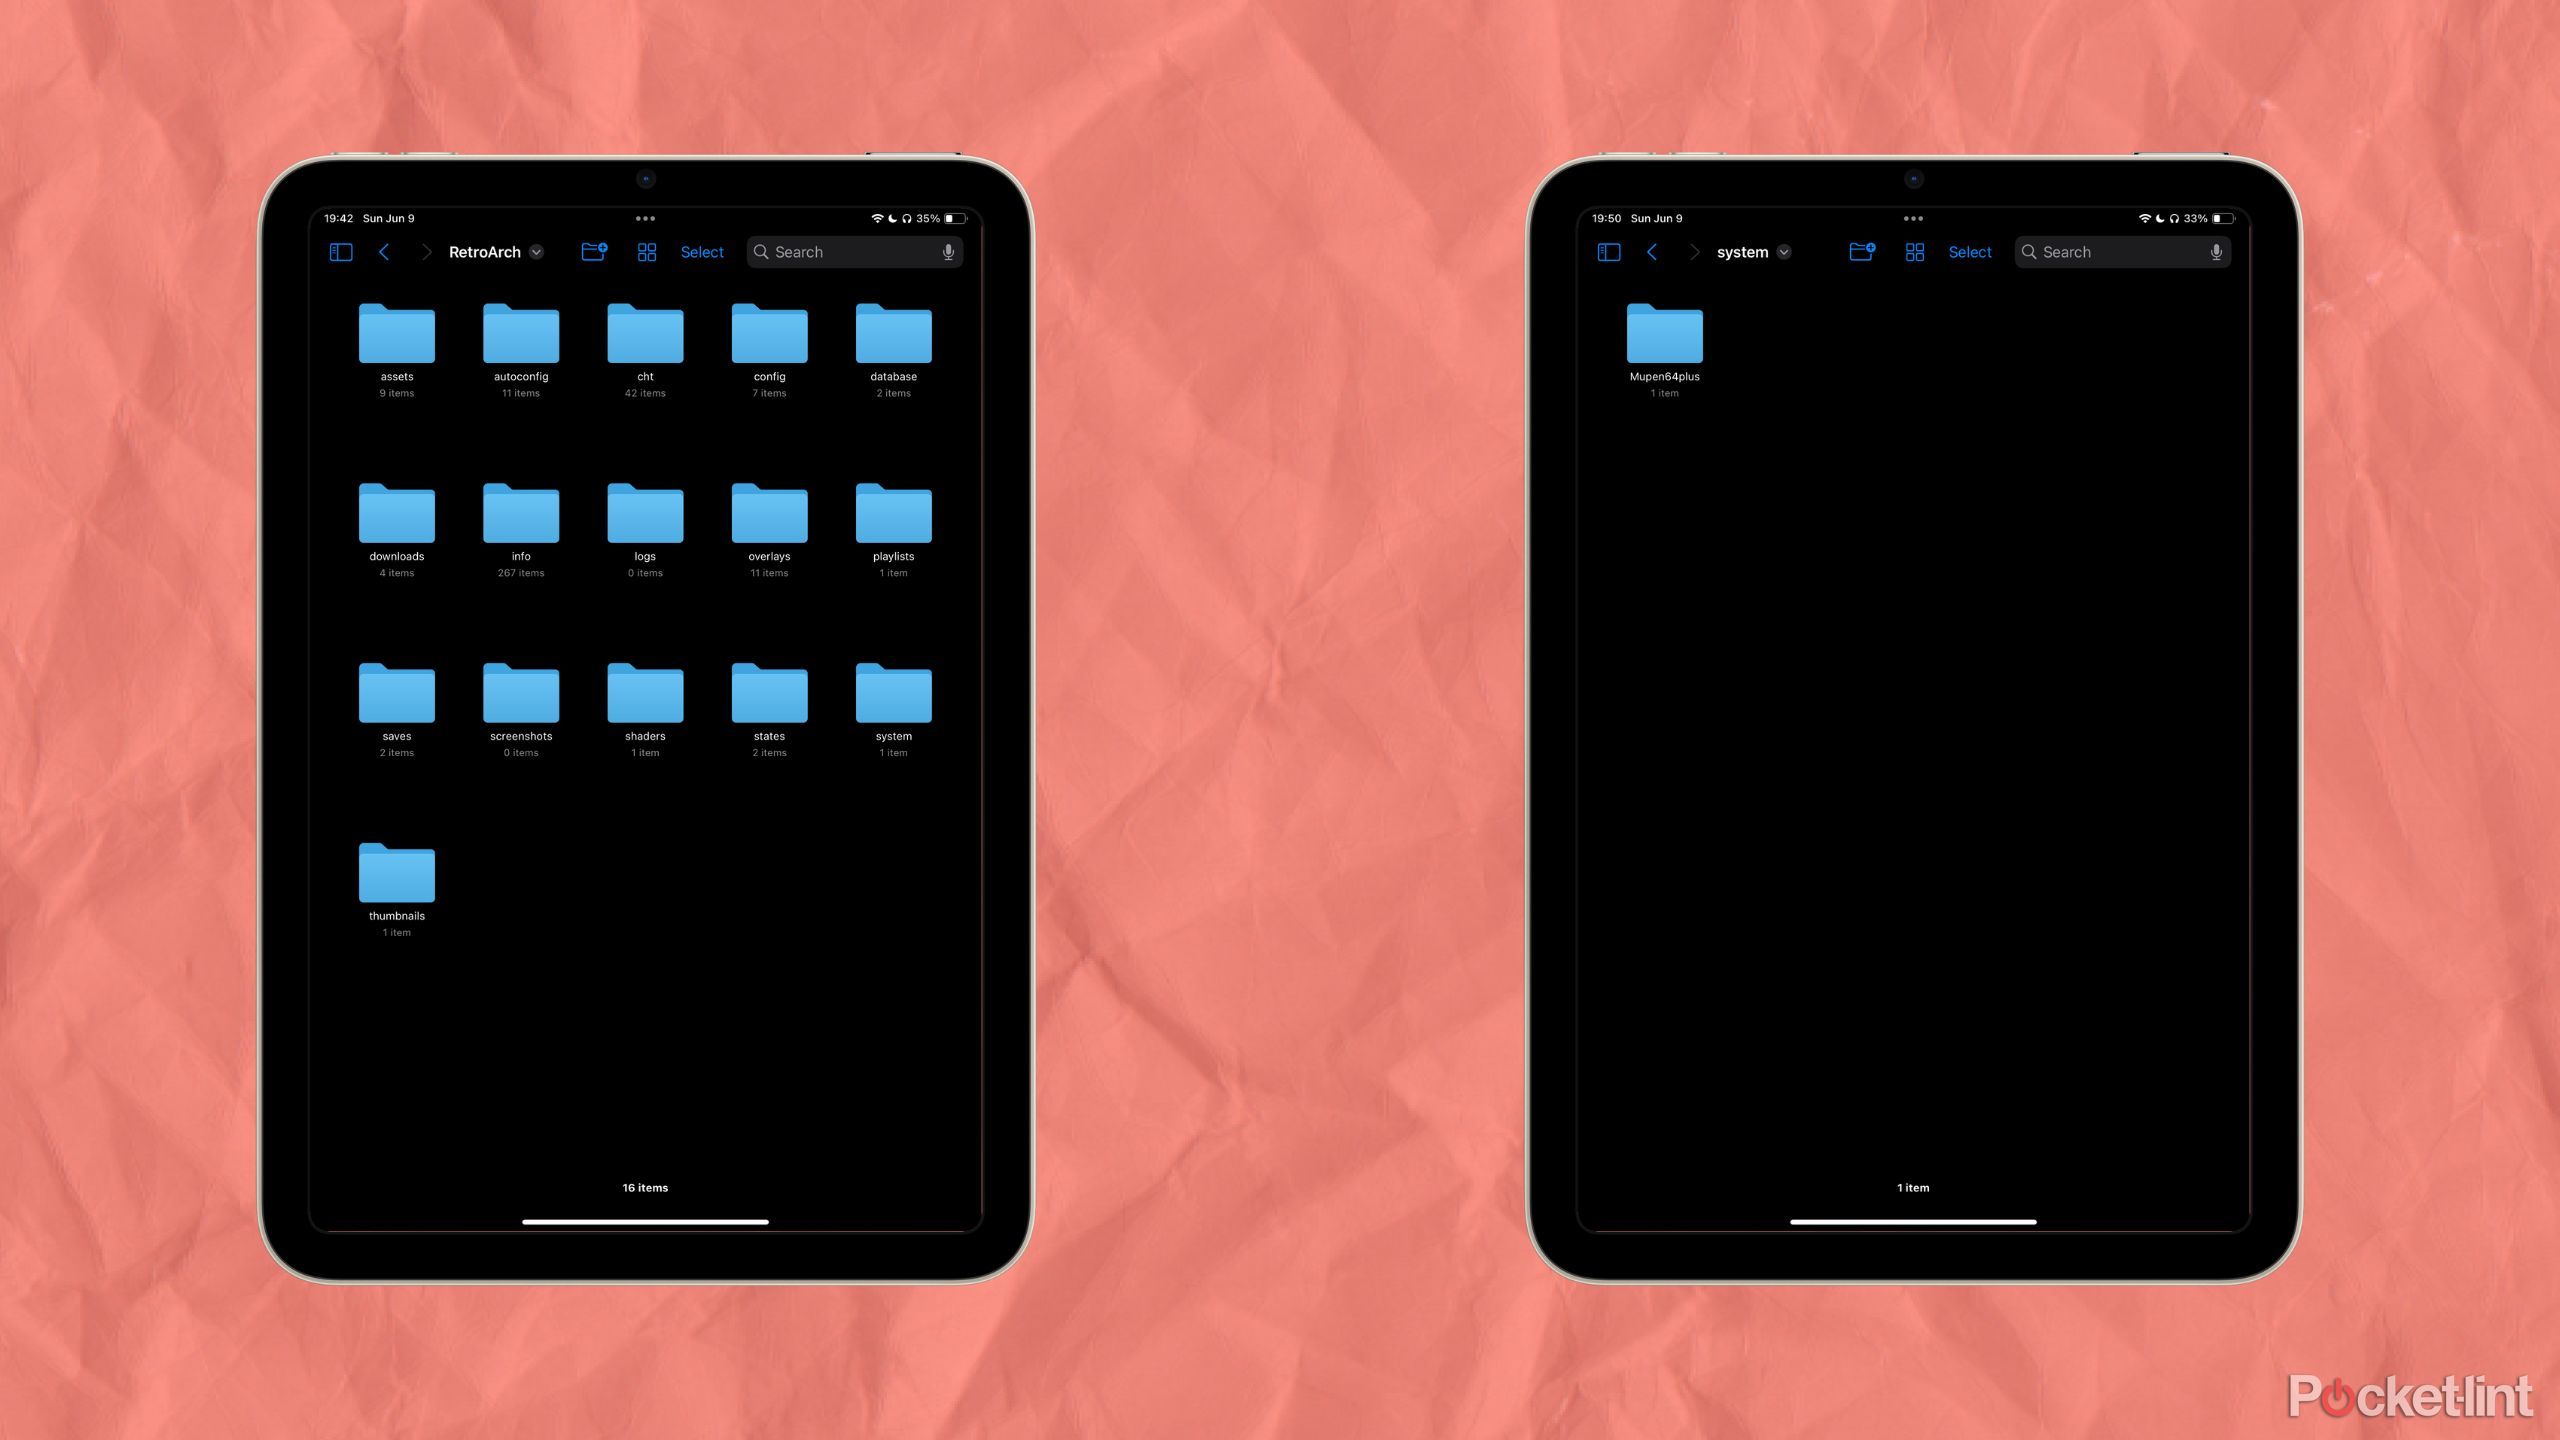
Getting these BIOS files legally requires that you own the console, and are able to extract the BIOS files from the console. Once you have the necessary BIOS files, you’ll want to get them onto your iPhone, iPad, or Apple TV. This is most easily done through iCloud Drive if you own a Mac. With the BIOS files on your device, getting them where they need to be is simple.
How to place BIOS files on your device running RetroArch
- Open the Files app.
- Find your BIOS files, and copy all of them.
- Navigate to your RetroArch directory.
- Open the System folder.
- Paste your BIOS files.
Just like that, all of your BIOS files will be in place and ready for RetroArch to use. Though not every emulator core requires BIOS files to run, the ones that do will work exponentially better with them in place.
8 Delta emulator games to play on your iPhone
You can relive all your childhood favorites with Delta, but start with these classics.
Setting up a ROMs directory for RetroArch
Making your RetroArch experience that much faster
Of course, the thing you downloaded RetroArch to do is emulate classic games. While loading up a game is easy enough to do with RetroArch, there are ways to make sure the experience is simple and easy. Especially for future use. With all the consoles available for emulation on RetroArch, it’s actually very easy to set yourself up with a nice library view. However, doing so will take a few steps to get in place.
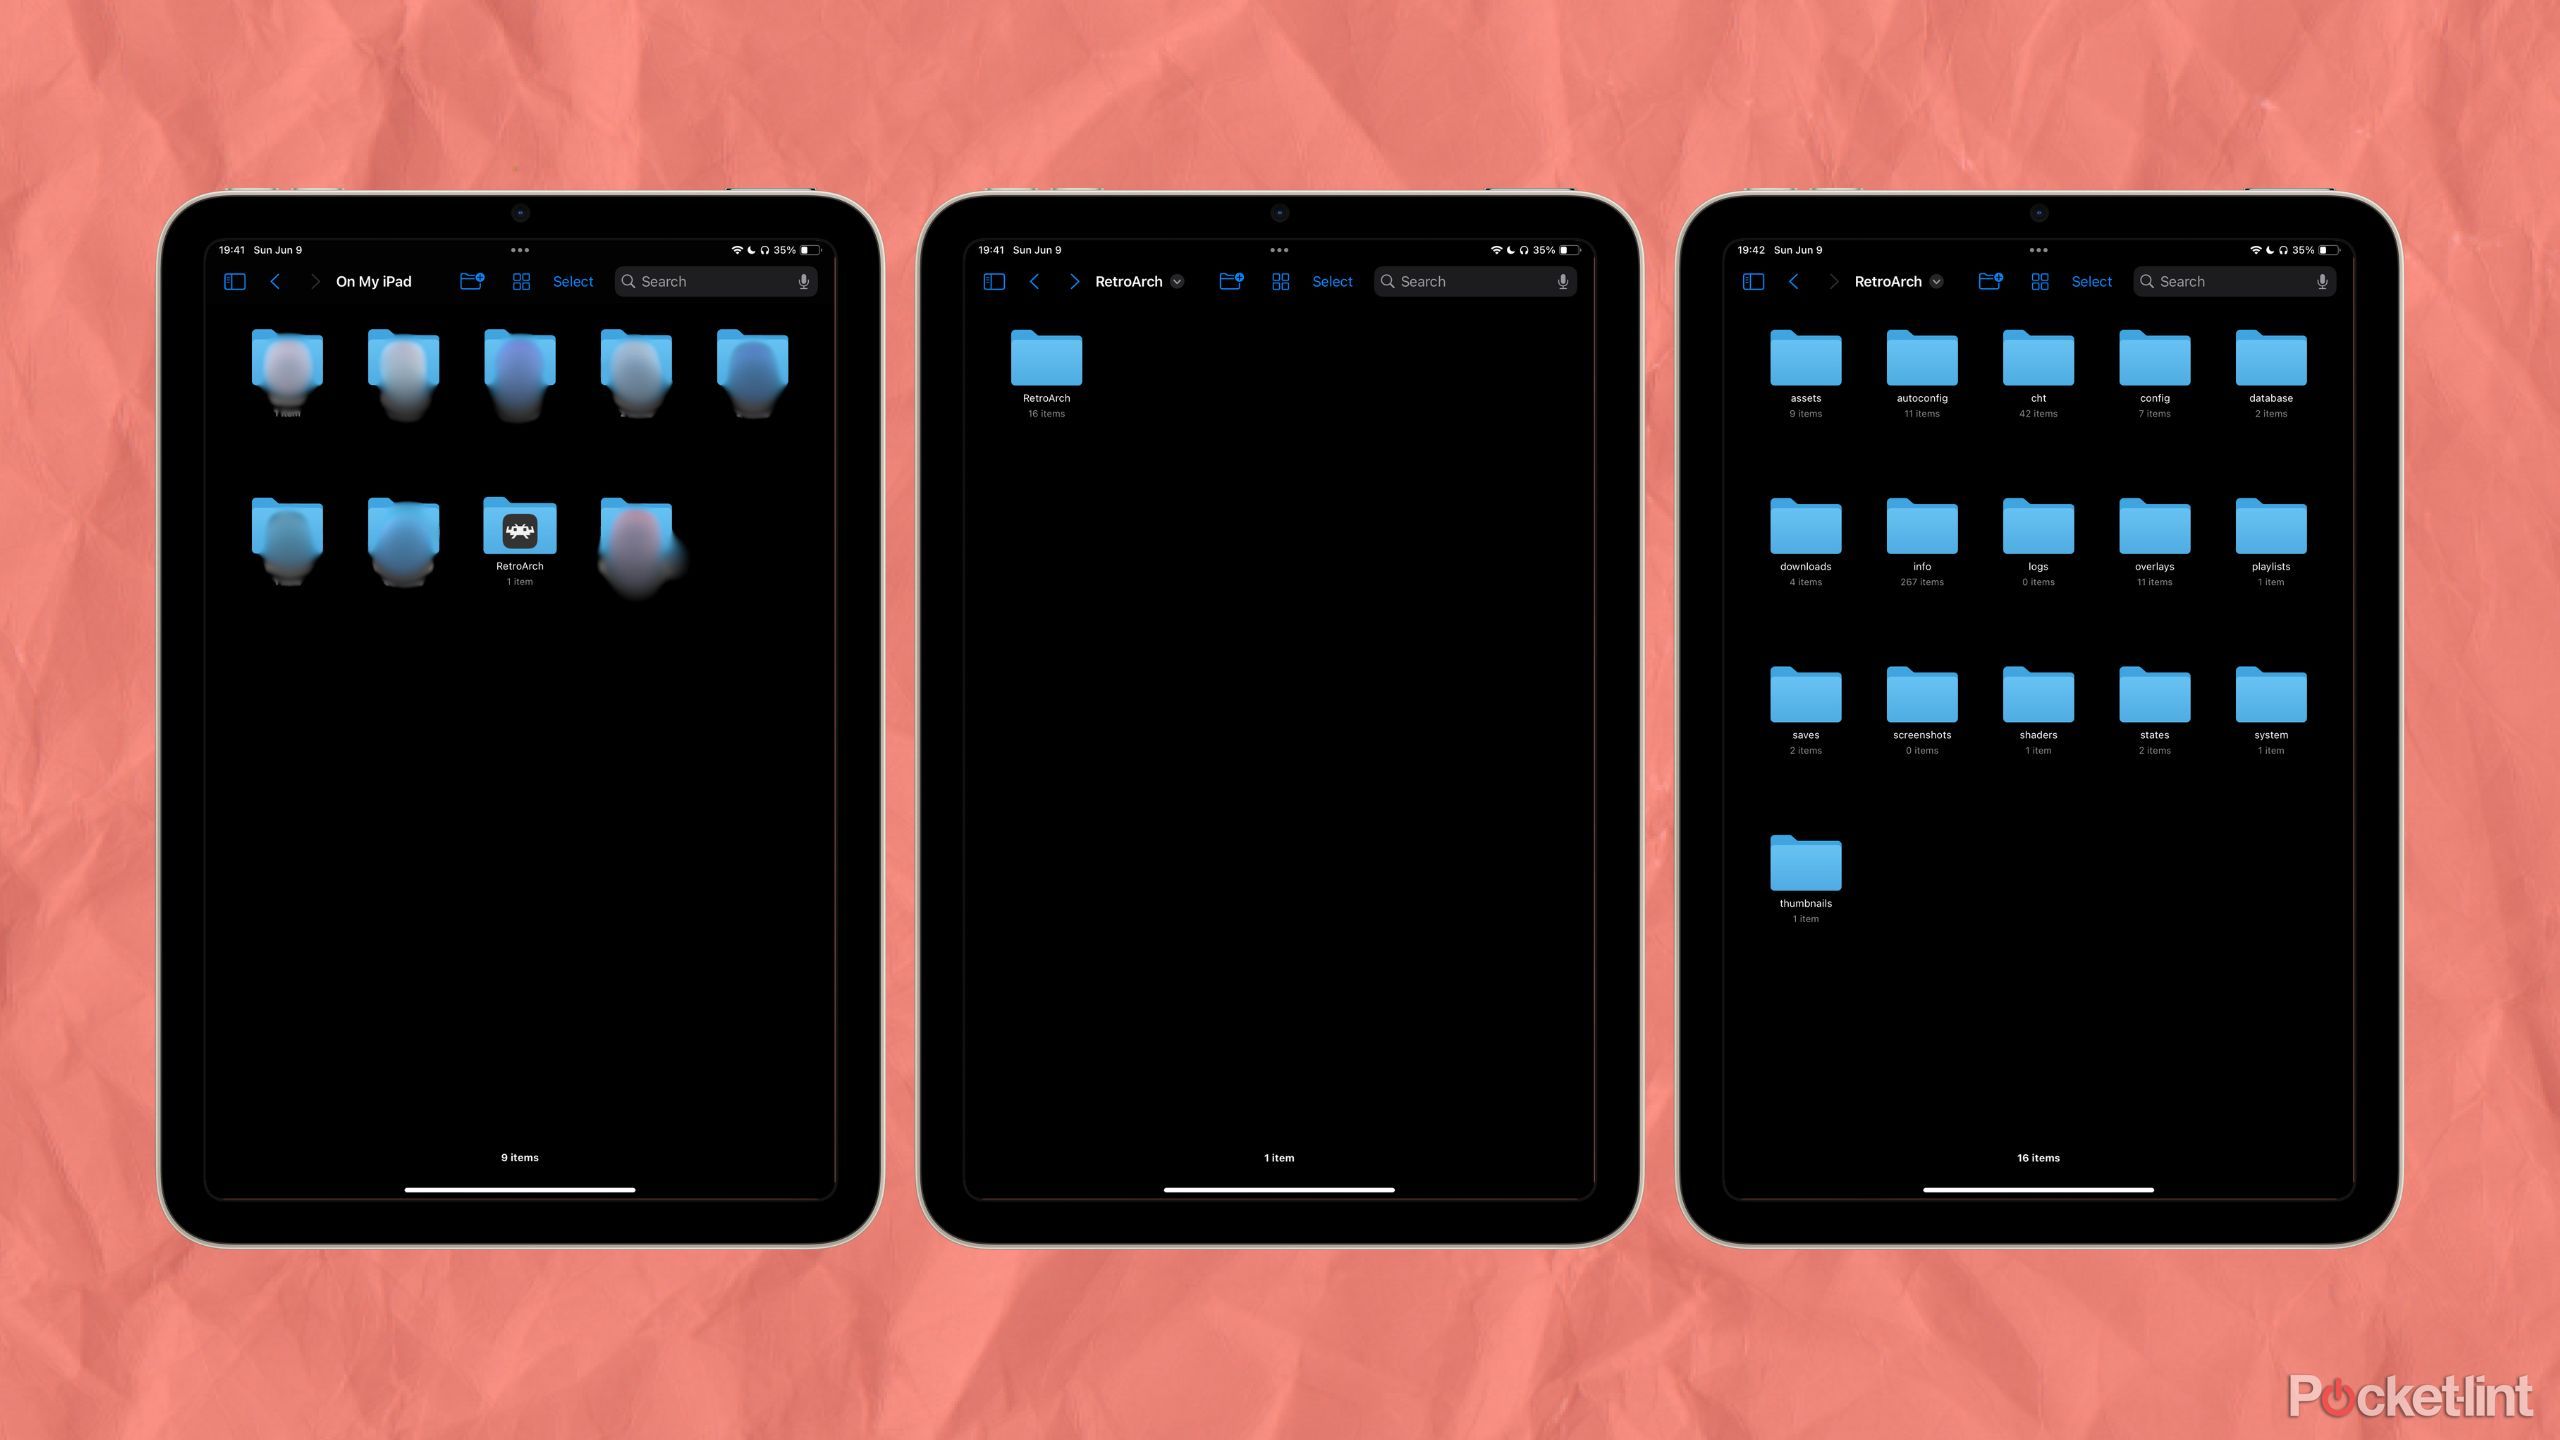
First and foremost, you’ll want to create a game folder in your RetroArch directory. In the Files app, your RetroArch directory will be located under “On My iPhone/iPad.” In your RetroArch directory, there will be a second folder named RetroArch. Inside that folder, you’ll want to create a folder for your ROMs. It doesn’t matter what you name the folder, as long as you know what it’s called.
Within your ROMs folder, you can go ahead and create separate folders for each console. Once you have your preferred folders created, you can go ahead and move any ROMs you want to load into their respective folder. Next, point RetroArch at your ROMs folder. Doing so is very simple, and will save you quite a bit of time in the next steps.
To get your ROMs folder set for default browsing on RetroArch
- Open RetroArch.
- Navigate to the Settings tab.
- Select Directory.
- Select File Browser.
- Find your ROMs folder.
- Open it and select Use This Directory.
With these settings changed, you’ll now be pointed to your created ROMs folder by default when searching for files to emulate.

How to play all the Assassin’s Creed games in order
The Assassin’s Creed series is a mess of numbers and subtitles. Let me break down the timeline so you know where to begin.
Creating your RetroArch game library
Where RetroArch becomes beautiful
One of the best parts of RetroArch is actually setting up your game library. In just a few steps, you’ll see your ROM library beautifully laid out for easy browsing and playing.
- Open RetroArch
- Navigate to the Import Content tab
- Select Scan Directory.
- Select Scan This Directory.
With the previous set-up of having pointed RetroArch directly to your ROMs folder, it will open directly to it when selecting “Scan Directory.” When your ROMs folder has opened, you can choose to open individual folders for different console libraries and scan them individually if you prefer to do so.
Once your ROMs have scanned in, you will be greeted with a number of new tabs for each corresponding console. These tabs will display to you the name of each game, as well as their cover art. From here, you can select a game and which core you’d like to emulate the selected console with, then start playing.

5 hottest games shown off at Summer Game Fest
Summer Game Fest kicked off this showcase season with a bang. These were the games that got me most excited.
Final steps and fine-tuning RetroArch
Make sure you have the best possible experience
With all of the above steps completed, you’ll be well on your way to using RetroArch to emulate countless retro consoles. But, there are a few additional and completely optional steps you can take to make sure you have the best possible experience with your retro gaming.
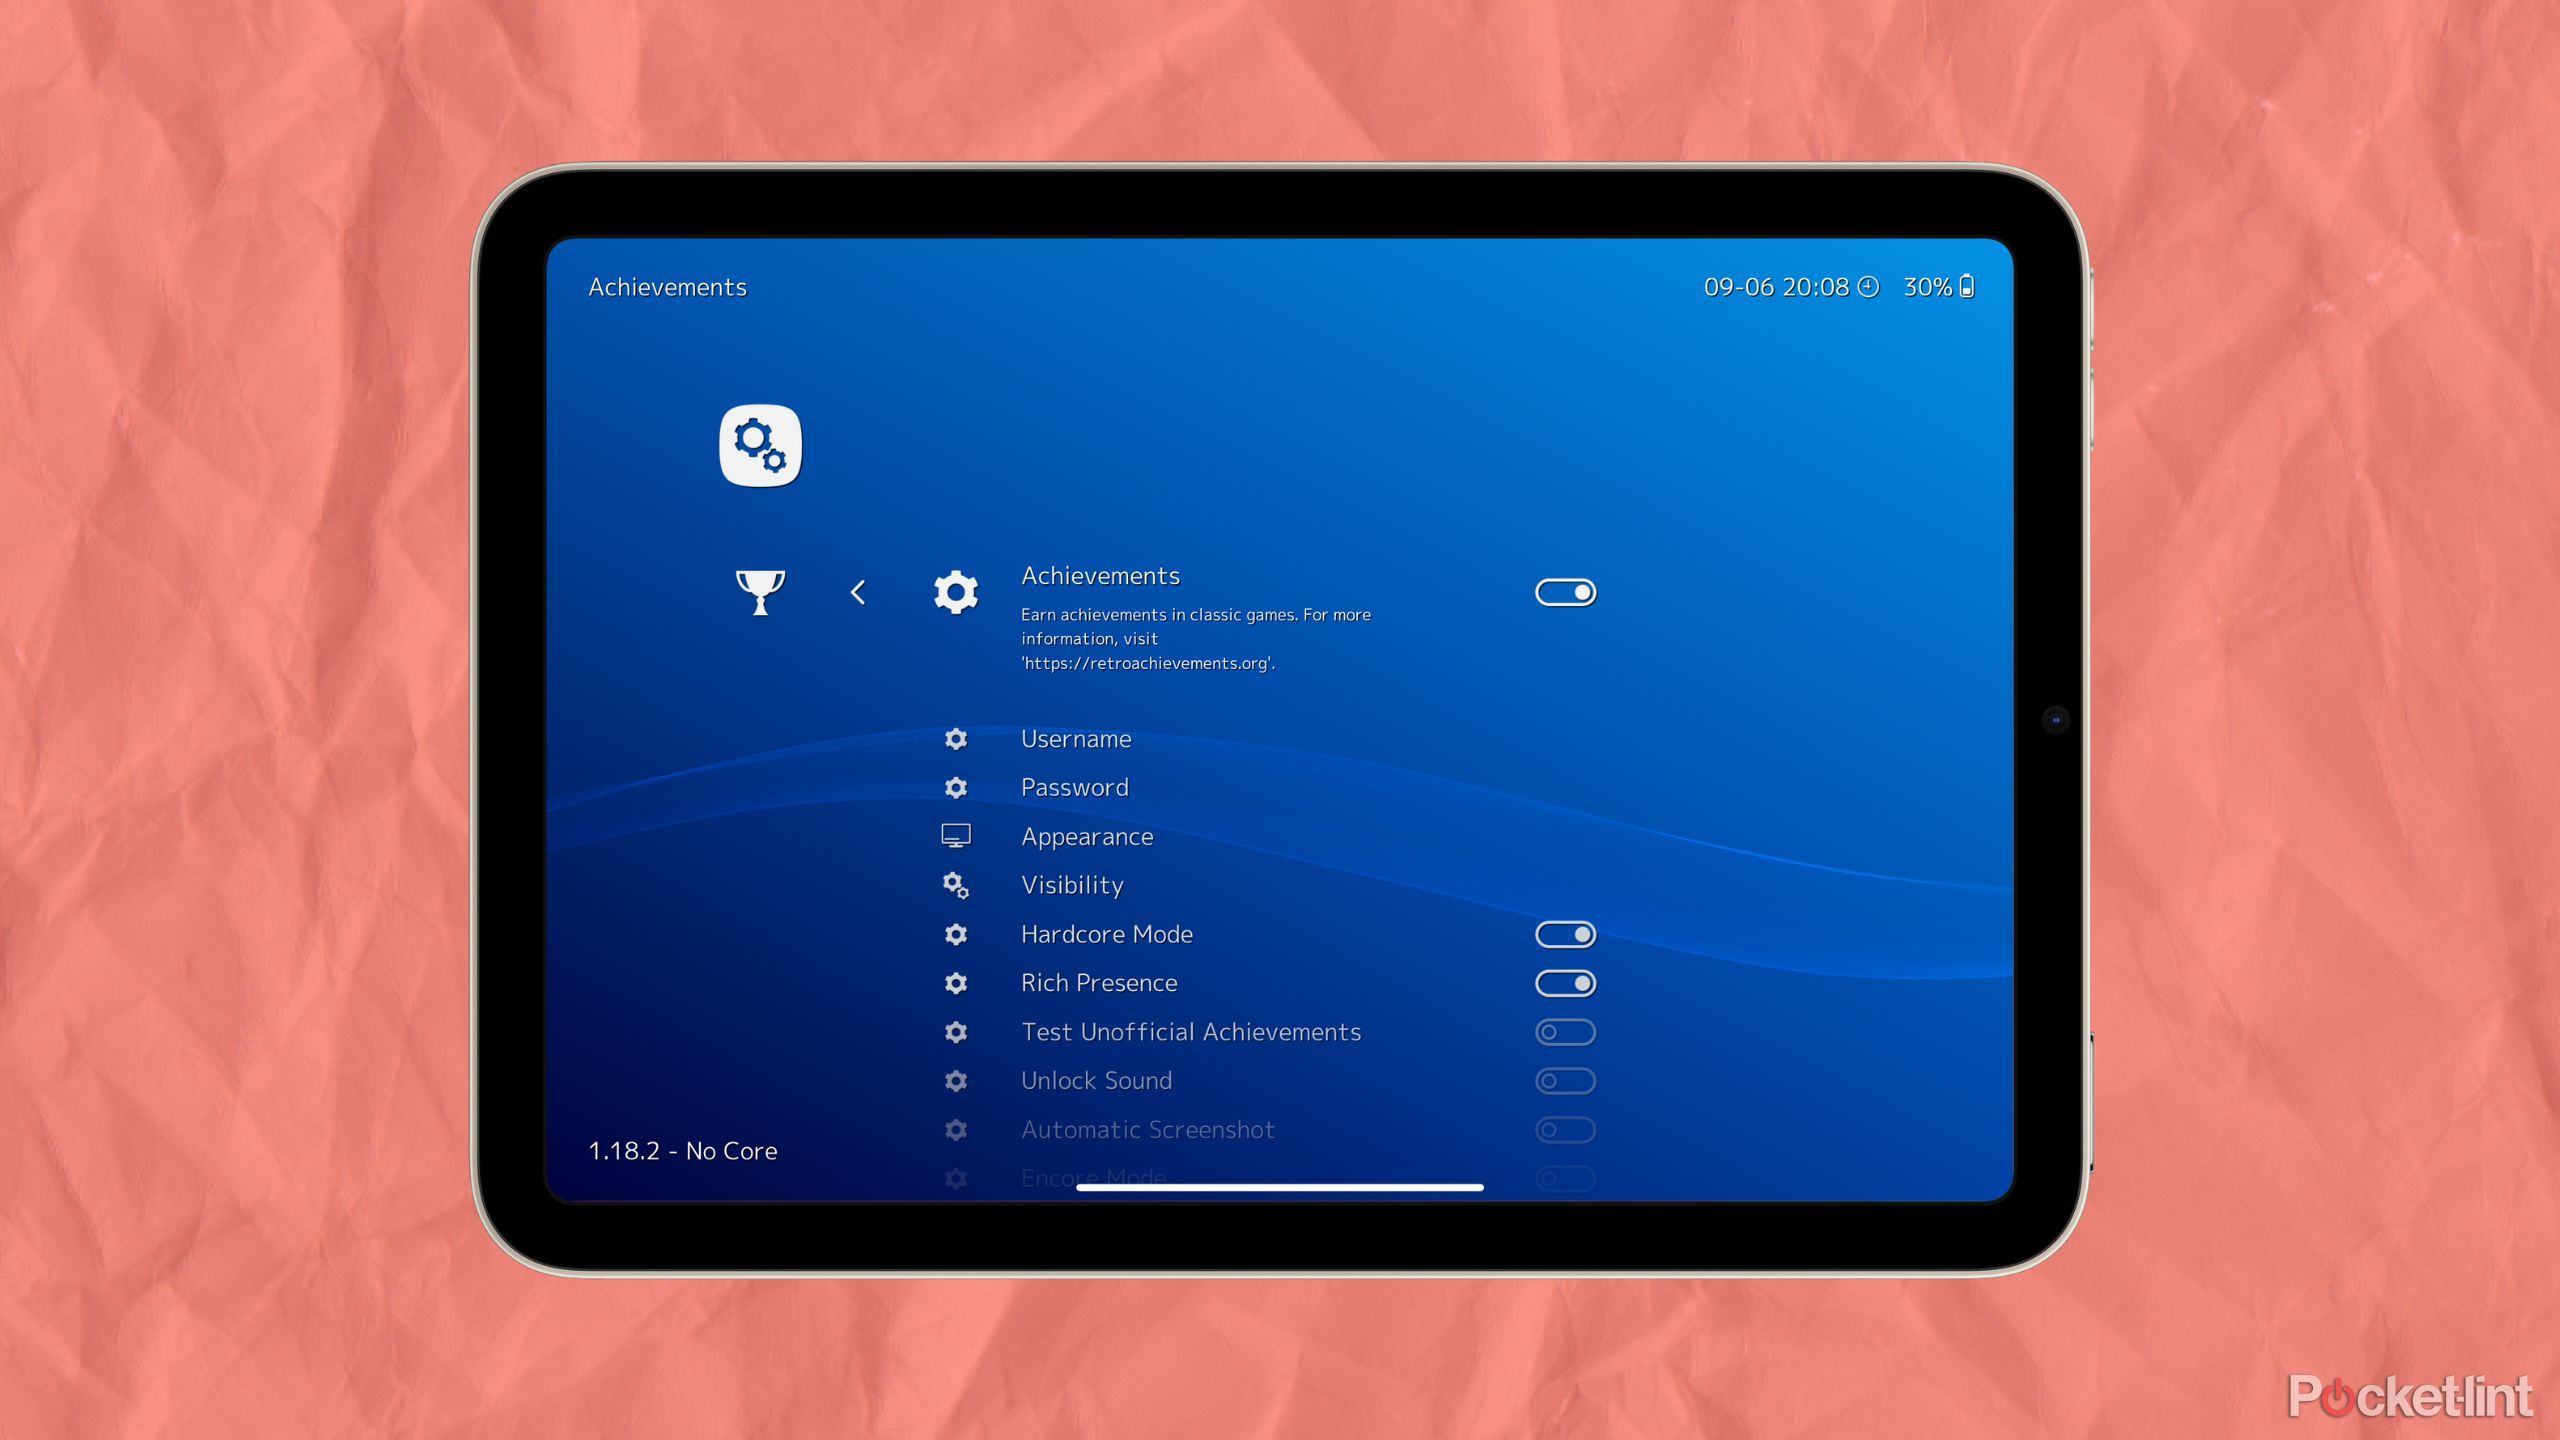
First, if you like the feeling of gaining achievements and sharing progress with friends, you can actually do just that with RetroArch. You’ll first need to create a RetroAchievements account, and then you can link it up on RetroArch.
How to create a RetroAchievements account and link it to RetroArch
- Open RetroArch.
- Navigate to the Settings tab.
- Select Achievements.
- Set Achievements as enabled.
- Input your RetroAchievements username and password.
After setting up achievements, you’ll begin gaining achievements for in-game activities in the various retro games you choose to emulate. You can also enable or disable a “Hardcore Mode,” which makes it so that achievements can’t be earned when using save states, speed modifiers, or cheats.
One other key function of RetroArch to bear in mind is the graphics of what you’re emulating. Many of the retro games you might plan on emulating were made with very specific displays in mind, and might look a little different than you remember when running on the display of your iPhone. Thankfully, RetroArch does have a built-in way to mitigate this.
When emulating a game in RetroArch, you can access the RetroArch menu using the previously set-up command on your controller or by pressing the RetroArch button on the on-screen interface. With the RetroArch menu open, you can then navigate to
“Core Options”
and
“Shaders”
to make some graphical adjustments to the way games look when emulated.
The Shaders settings in particular house many presets that you can experiment with, and they will reset every time you open a different game for the emulation core you applied any presets to. If you find Shaders settings that you want to have quick access to, you can save a preset to load up alongside any game.
And all of that is truly only the surface of the settings RetroArch has to offer. While it may seem daunting at first, you may quickly find yourself tinkering with settings to get your experience emulating your favorite classic games as close to your memory as you can. Armed with the basics of how to use RetroArch, you’ll be more than ready to begin using one of the most versatile emulators now available on the Apple App Store.
1:00
Anbernic’s RG405M retro emulator offers a nostalgic blast from the past
This portable Anbernic emulation device has been all over my TikTok. But is it as good as it seems?
Trending Products

Cooler Master MasterBox Q300L Micro-ATX Tower with Magnetic Design Dust Filter, Transparent Acrylic Side Panel, Adjustable I/O & Fully Ventilated Airflow, Black (MCB-Q300L-KANN-S00)

ASUS TUF Gaming GT301 ZAKU II Edition ATX mid-Tower Compact case with Tempered Glass Side Panel, Honeycomb Front Panel…

ASUS TUF Gaming GT501 Mid-Tower Computer Case for up to EATX Motherboards with USB 3.0 Front Panel Cases GT501/GRY/WITH Handle

be quiet! Pure Base 500DX ATX Mid Tower PC case | ARGB | 3 Pre-Installed Pure Wings 2 Fans | Tempered Glass Window | Black | BGW37

ASUS ROG Strix Helios GX601 White Edition RGB Mid-Tower Computer Case for ATX/EATX Motherboards with tempered glass, aluminum frame, GPU braces, 420mm radiator support and Aura Sync

CORSAIR 7000D AIRFLOW Full-Tower ATX PC Case – High-Airflow Front Panel – Spacious Interior – Easy Cable Management – 3x 140mm AirGuide Fans with PWM Repeater Included – Black


