Key Takeaways
- Use collaboration tools in Apple Notes to easily share and edit notes with others, like shared grocery lists or trip planning.
- Pin favorite notes to the top for easy access by tapping the three dots menu and selecting ‘Pin.’
- Create a Quick Note shortcut in the Control Center for easy access to starting new notes without going back to the home screen.
Packing for a family of five is a major endeavor, and it’s one that typically requires several messages starting with “Did you pack…” But after around five texts, my travel-weary brain realized I could save a lot of back-and-forth messages if I simply created a packing list in my iPhone 15 Pro’s Notes and used the built-in collaboration tools.
After the app took the brunt of the mental load of my trip, I started to wonder what else Apple Notes could do. It’s an unassuming app that comes pre-installed on iOS and MacOS devices — one that many Apple users underestimate.
Related
How to have a secret conversation with someone using Apple Notes
You can send instant messages back and forth — where nobody would ever think to look.
But Apple Notes is an excellent tool for more than its namesake. Besides note-taking, Apple Notes can be used to pass messages back and forth, scan text with your iPhone’s camera, or even create fully-formatted PDFs.
If you’ve never used Apple Notes for, well, anything other than basic notes, here are 10 hidden features you should try.
The collaboration tool is the modern way to pass a note to friends
The collaboration tools inside Notes lets you easily create a shared grocery list with your spouse or plan a large trip with your friends. The tools allow others to view or even add to the note. This can even be used as a hack for passing messages back and forth.
To start collaborating:
- Open the Notes app and select the note you want to collaborate on, or create a new note.
- At the top of the screen, tap the share icon (it’s the box with the arrow pointing up).
- At the top of the share screen, use the drop-down menu to select collaborate or send copy. Collaborate allows the invited user to add to or otherwise modify the Note. Send copy allows them to see the contents, but not modify them in any way.
- The people that you’ve recently sent messages to will appear at the top. To share, you can select from these people, or tap Messages or Mail to share via text message or email.
- Tap send to send the collaboration link.
- If you want to see who added what to the shared Note, tap on the collaborator’s photo at the top of the note and select Highlights. You’ll then see a sidebar that shows who wrote what part of the Note.
- If you need to stop sharing, tap the photo of the collaborator at the top of the note, then select Manage Shared Note from the bottom of the menu. From this screen, you can revoke access, add more people, or simply turn off alerts if you don’t want a notification for every change.
You can also share entire folders, rather than just a single note. You can do this by navigating to the desired folder and tapping the share icon.
Related
31 actually useful iMessage features, tips, and tricks
Here’s everything you need to know to get the most out of Apple’s Messages app.
2 Pin a favorite note to the top
Stop scrolling through junk and keep your favorites at the top
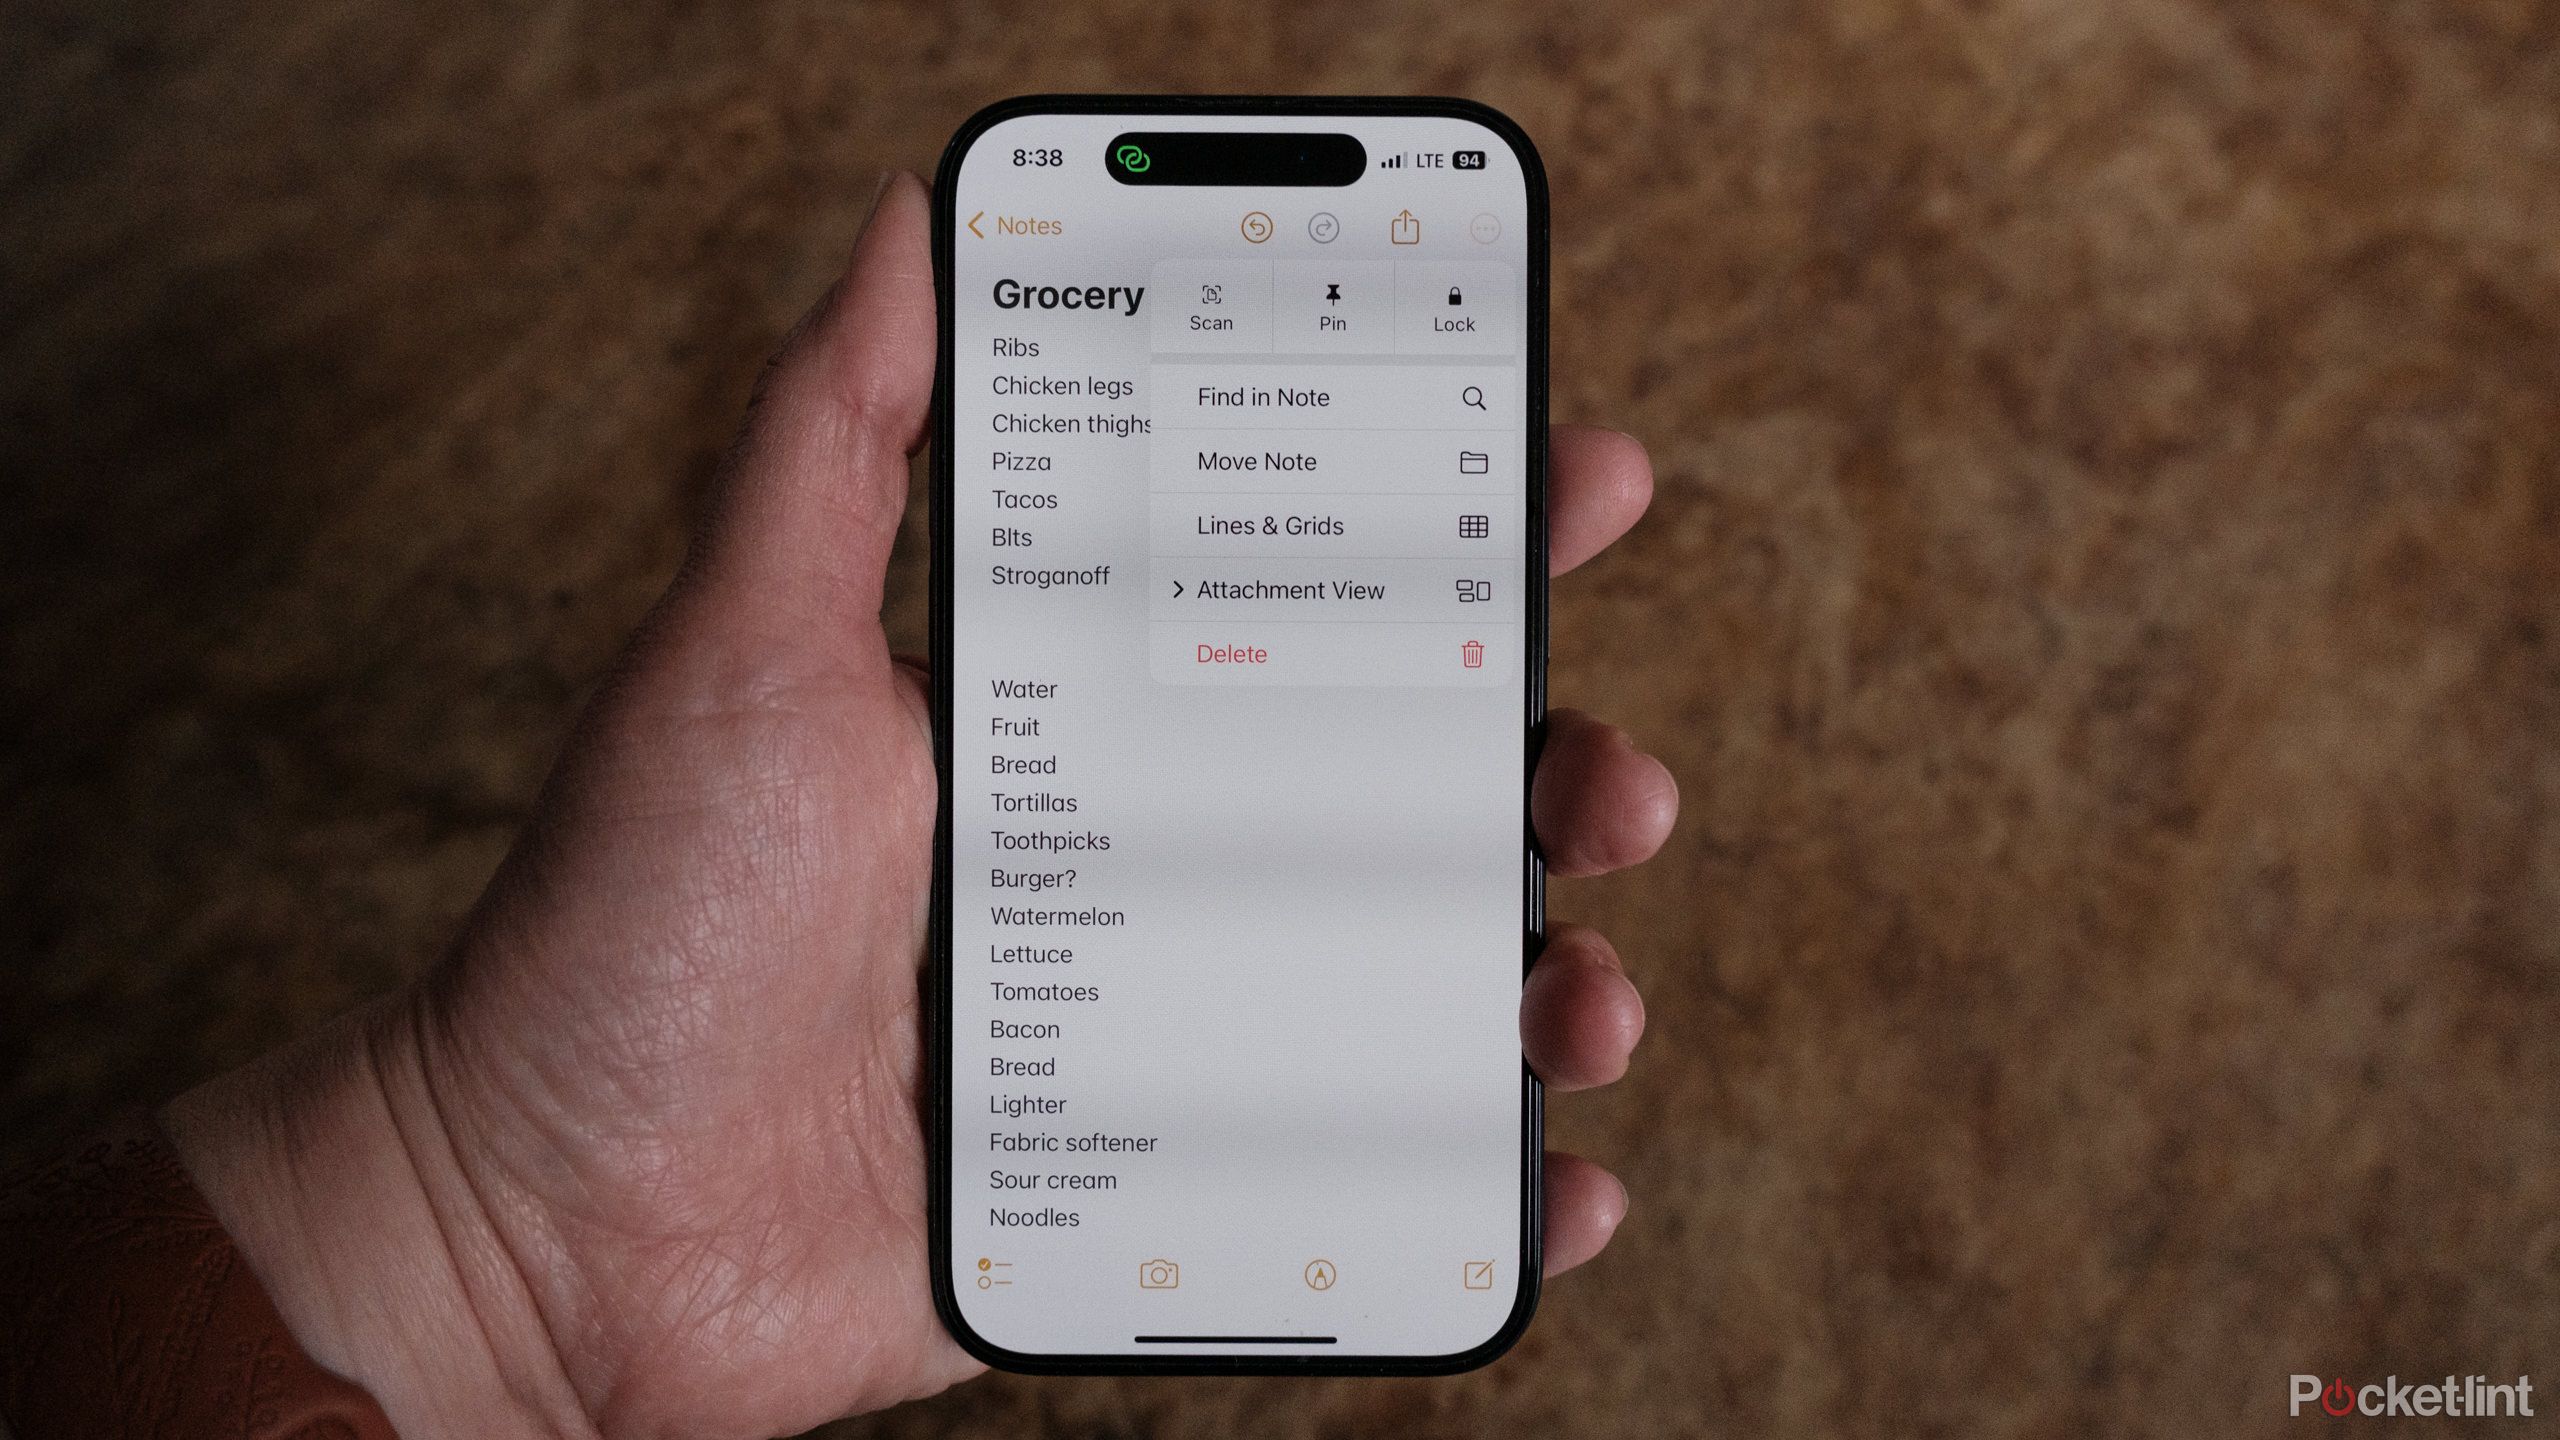
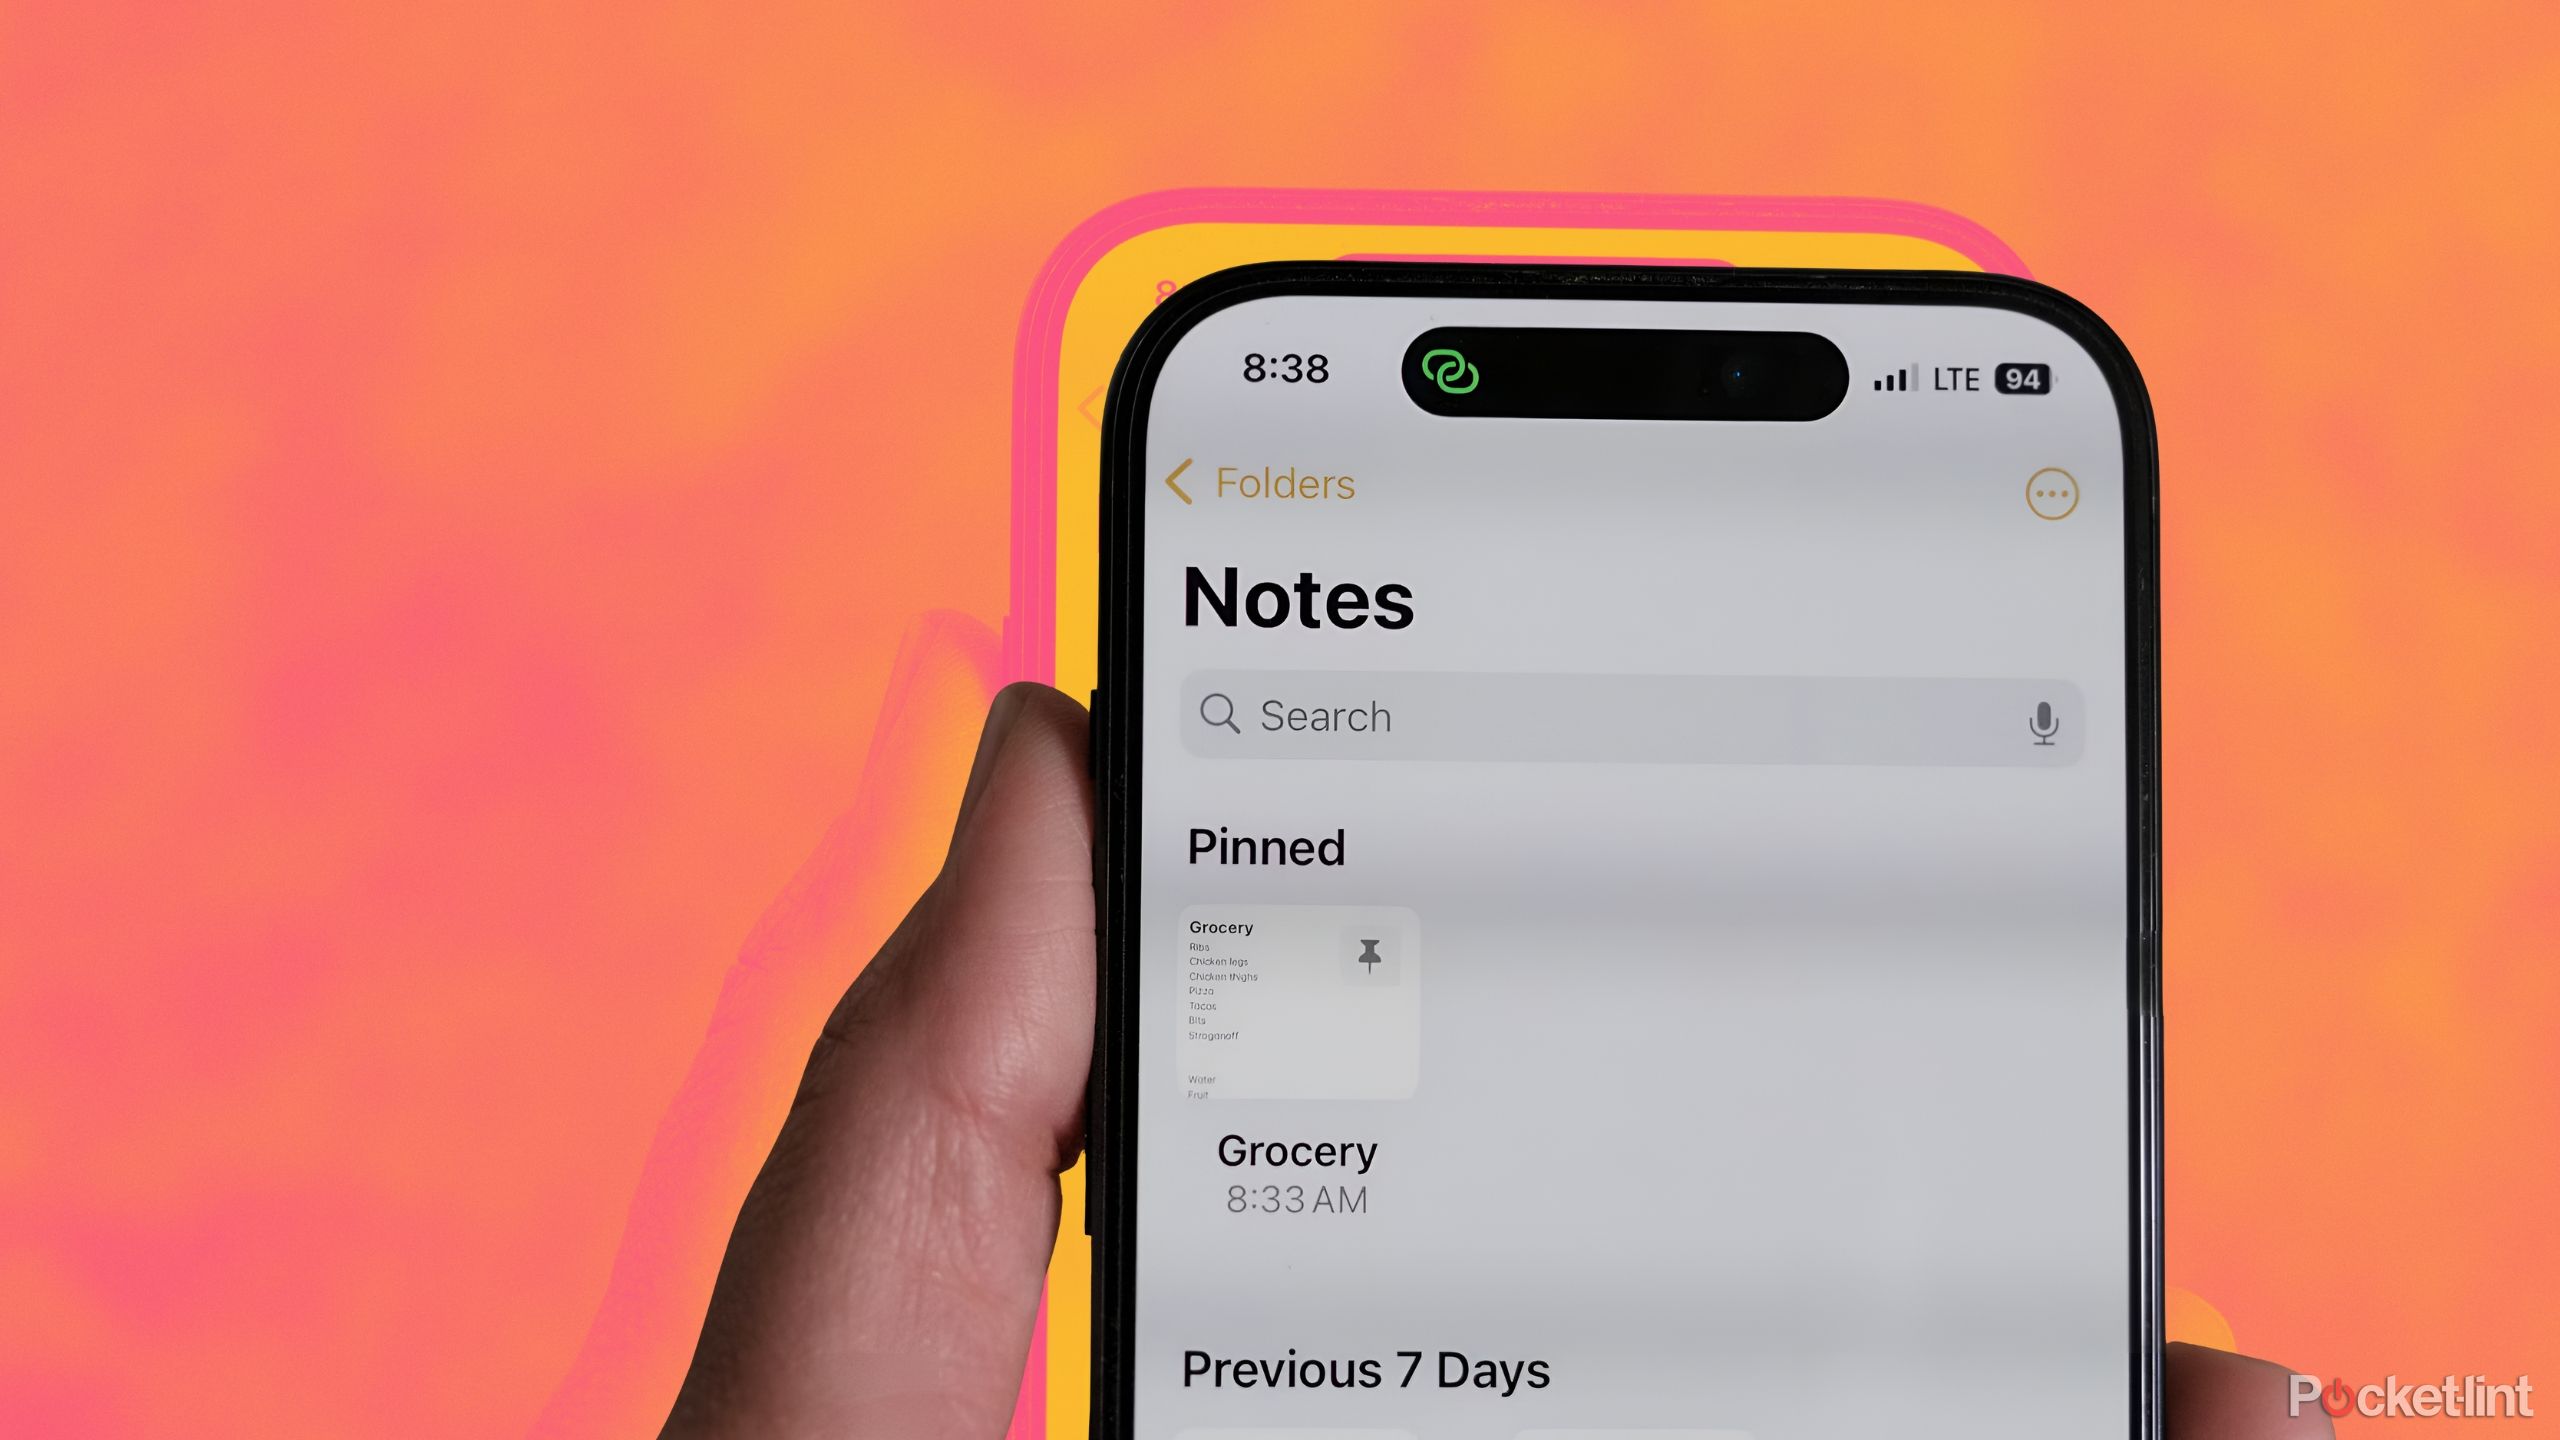
Sometimes I use Notes for something I only need to remember for an hour, and other times I use it for lists that I access every week — which means my Notes app is often a mess. But, there’s a simple way to add easy access to your most-used Notes.
Pinning a note keeps the document at the top of your Notes app for easy access.
- Open the Note you would like to pin.
- Tap the … menu.
- Select Pin.

Related
How to pin Instagram posts and reels to your profile
Instagram’s latest feature allows users to pin up to three posts or reels to the top of their profile. Here’s how to use it.
3 Create a Quick Note shortcut
This shortcut lets you start new notes from Control Center and other apps
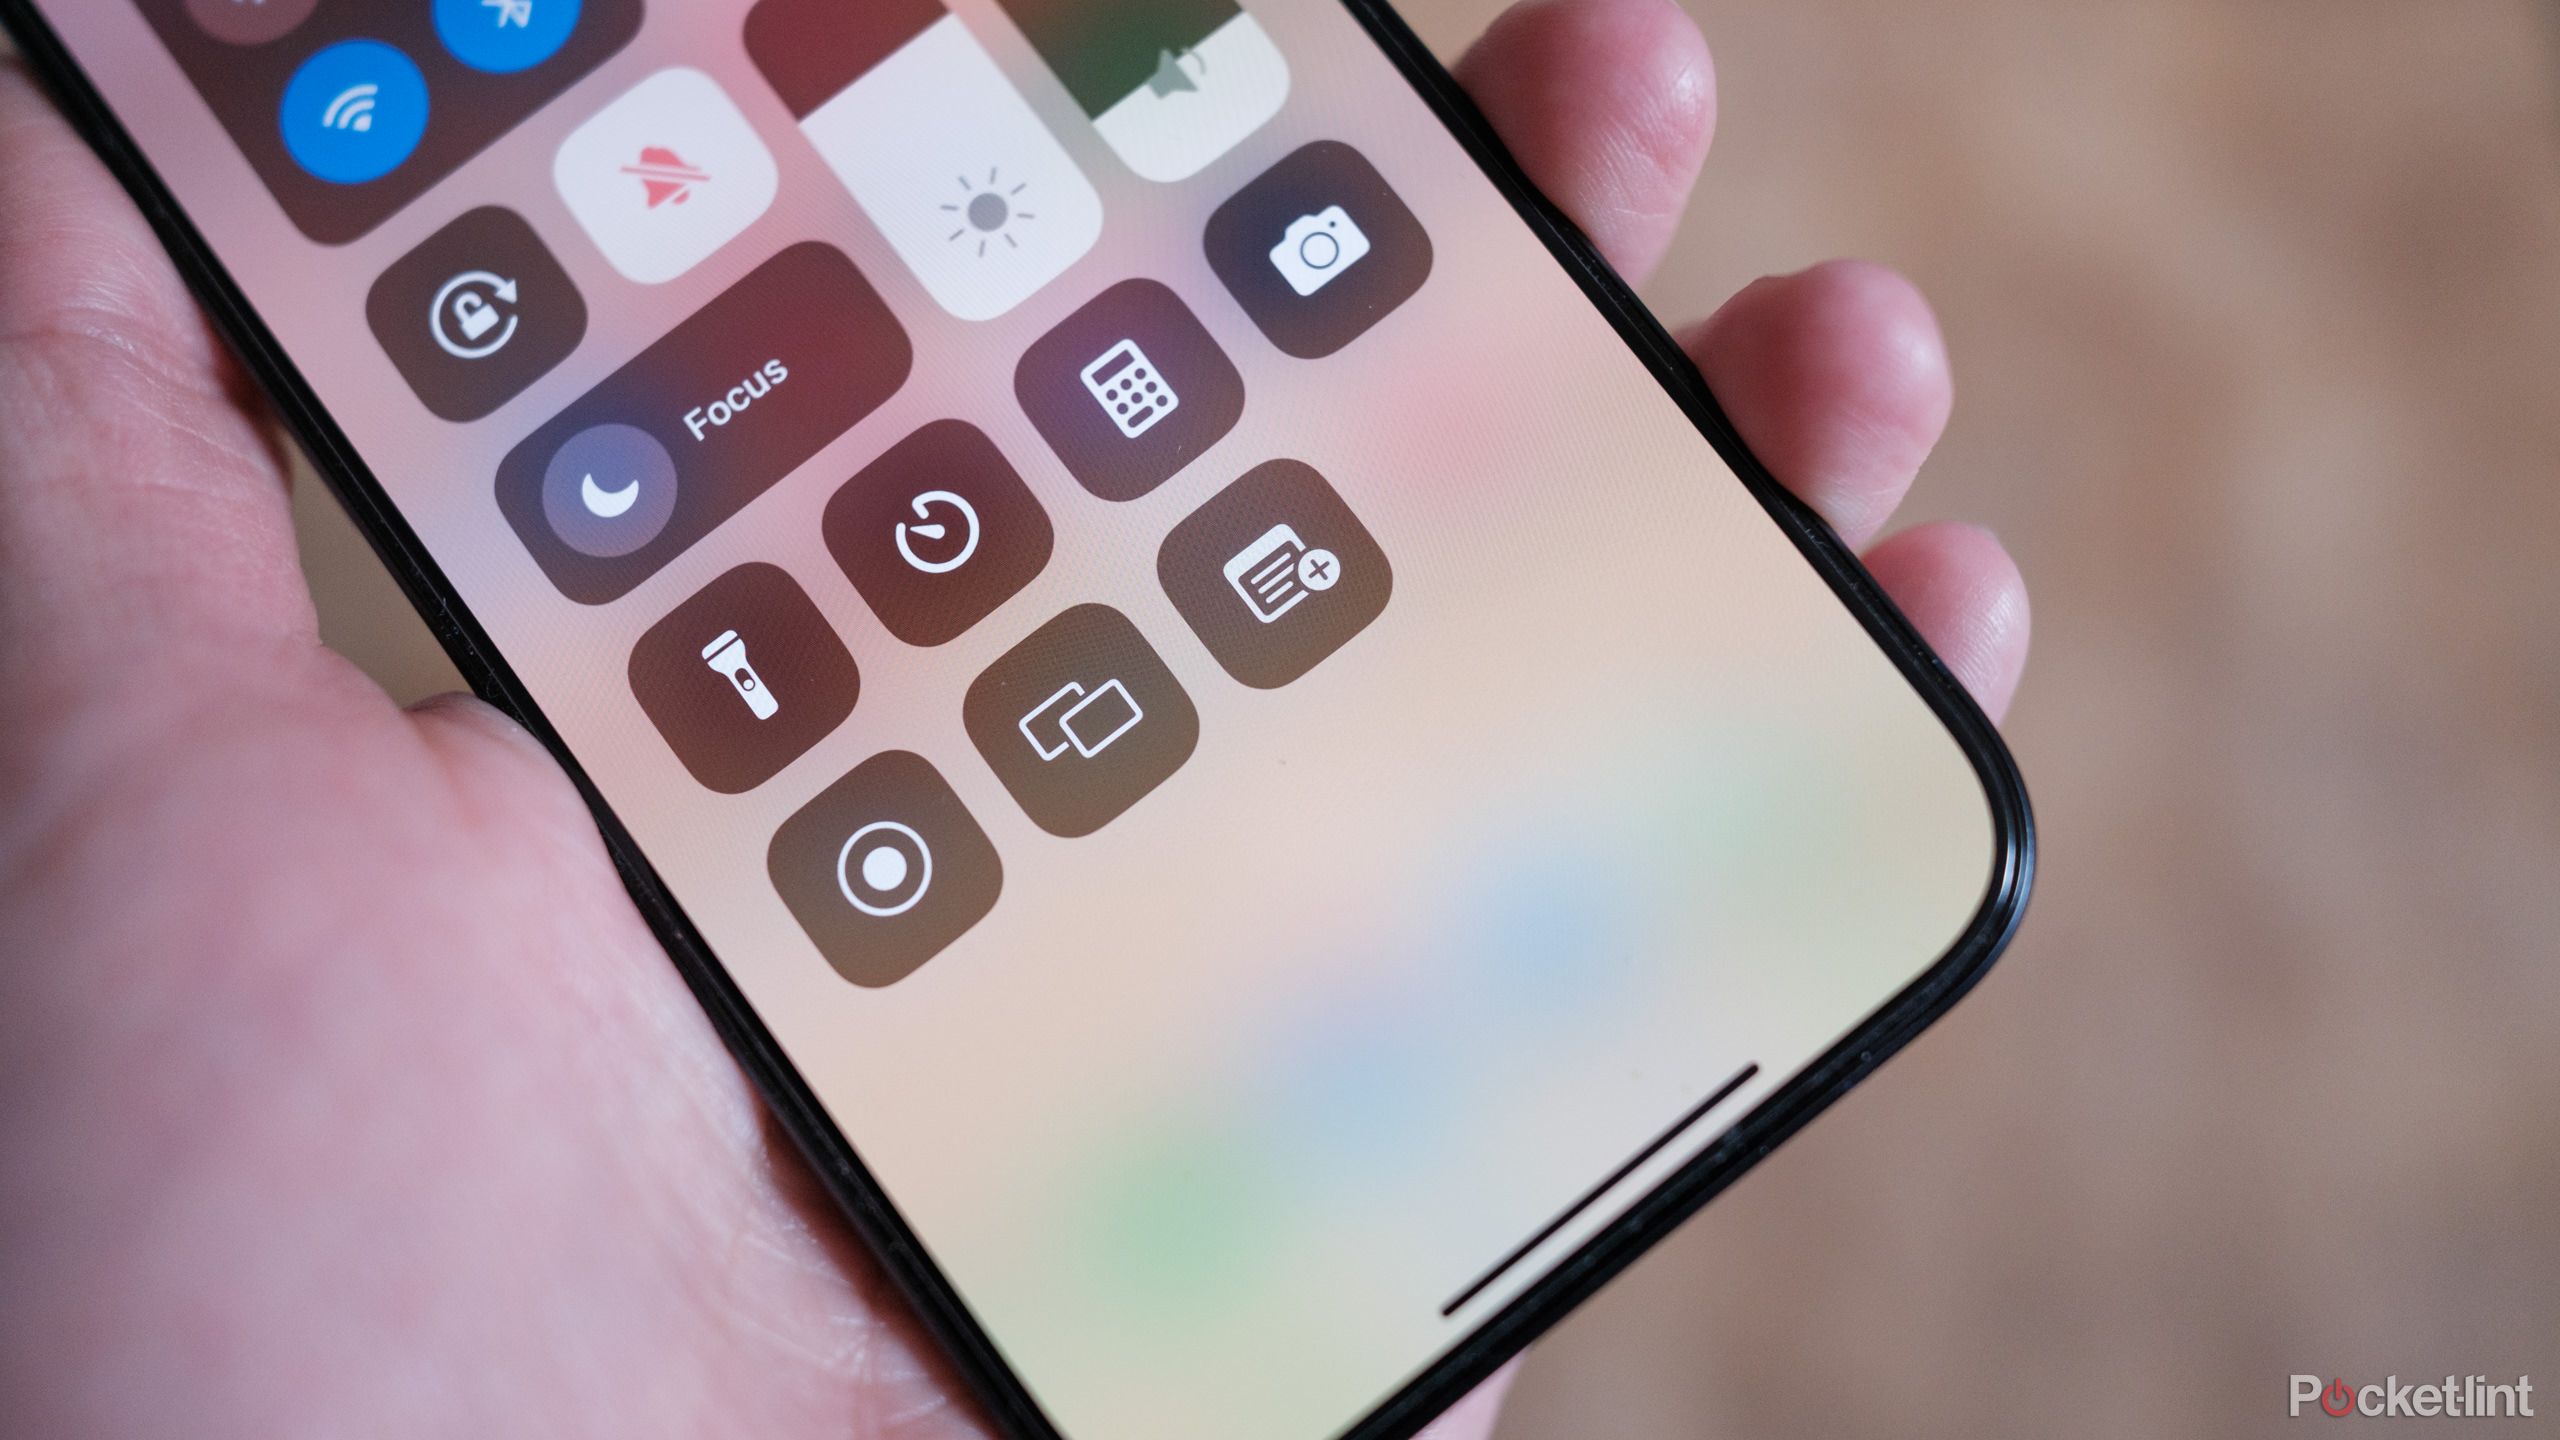
Because Notes is a tool for remembering nearly anything, accessing it quickly from any app can be handy. Adding Notes to the iOS Control Center will allow you to start a quick note by swiping down from the top right of the screen. This allows you to skip the process of returning to the home screen and pulling up the Notes app.
- Open the Settings App.
- Scroll down and tap on Control Center.
- Ensure “Access Within Apps” is toggled on.
- Then, scroll down to under More Controls and tap the green plus icon next to Notes.
- Exit the Settings app.
- Now when you need to start a new Note, swipe down from the top-right of the screen and select the Notes icon.
Related
6 note-taking apps I use to organize all my thoughts
When your mind runs at a mile a minute like mine, you need to write ideas down as they come. Here are the apps I use to keep my thoughts in line.
4 Organize with folders
Creating new folders is a simple way to find related Notes easily
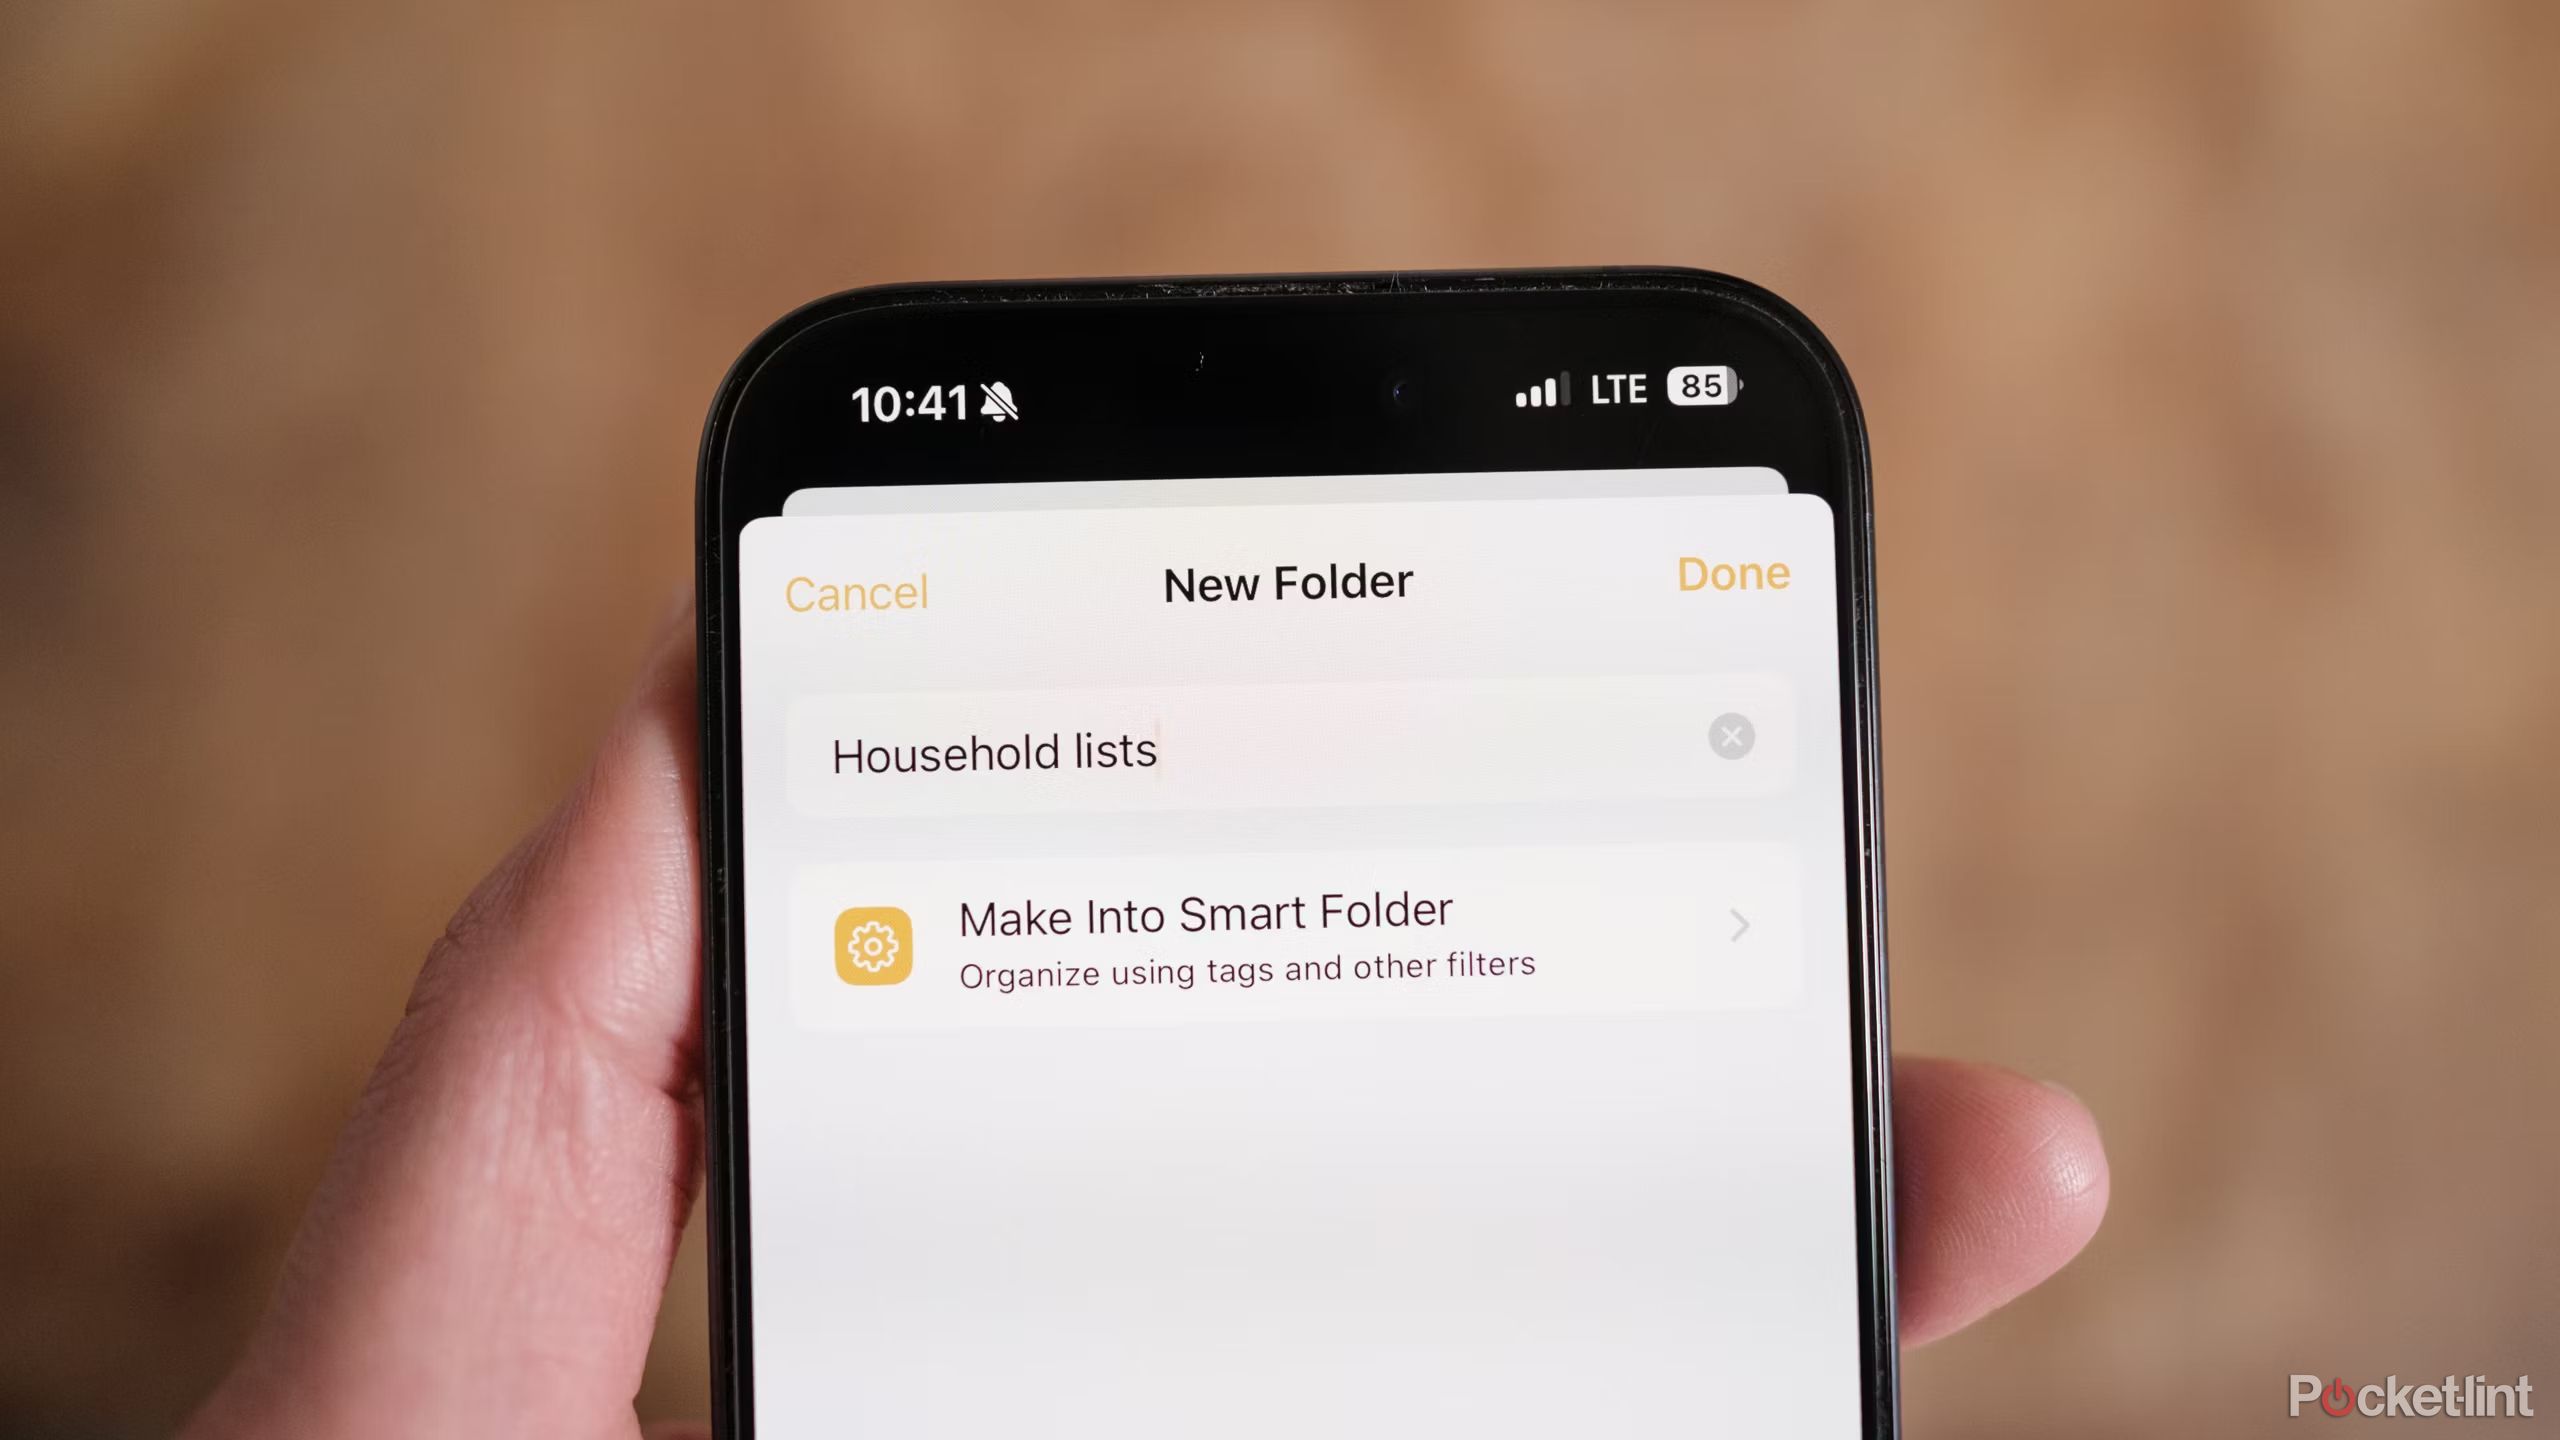
Admittedly, before I started digging into everything the Notes app can do, my own app was an unorganized mess. But, Apple offers a few easy tools to keep the app organized. Just like on the Files app or a desktop computer, you can organize Notes into folders.
- Open the Notes app. If you already have a Note or Folder open, tap on the upper left corner to go back to your folder, then again to go back to all folders. (If you’ve never created a folder before, this icon probably says something like “All iCloud” or “Notes” followed by “Folders” on the next screen.)
- Once on the Folders page, tap the folder icon with the plus sign in the lower left corner to add a new folder.
- Give the folder a name, then tap Done.
- Go back to the Folders Page, then select Notes or All iCloud (or wherever the notes you want to organize are located).
- On the name of the note you want to move to the new folder, swipe left, then tap the purple folder icon.
- Select the name of the folder you want to move the note to.
- Repeat steps 4-6 until the folder contains all the desired notes.
5 Automatically create folders using Smart Folders
You can even use hashtags to put them into a folder automatically
While creating a new folder only takes a few seconds, Apple can also organize Notes for you automatically. This key feature is called Smart Folders. Using this tool allows you to set specific parameters, then any Note that meets those requirements will automatically move into that Smart Folder.
Another key hack? If you label your notes using hashtags, you can automatically organize them into folders based on topics. For this hack, you don’t need to manually create a smart folder because you can tap on the hashtag from the folders page to access all Notes with that Hashtag. You can, however, create a Smart Folder using the hashtag if you want more tools, including the option to share an entire folder rather than sharing one Note at a time.
- Open the notes app and navigate to the page that says Folders at the top — if you are already on a Note or inside a folder, use the back icon in the upper left corner.
- Tap on the new folder icon in the lower left corner.
- Give the new folder a name.
- Tap on Make it a Smart Folder.
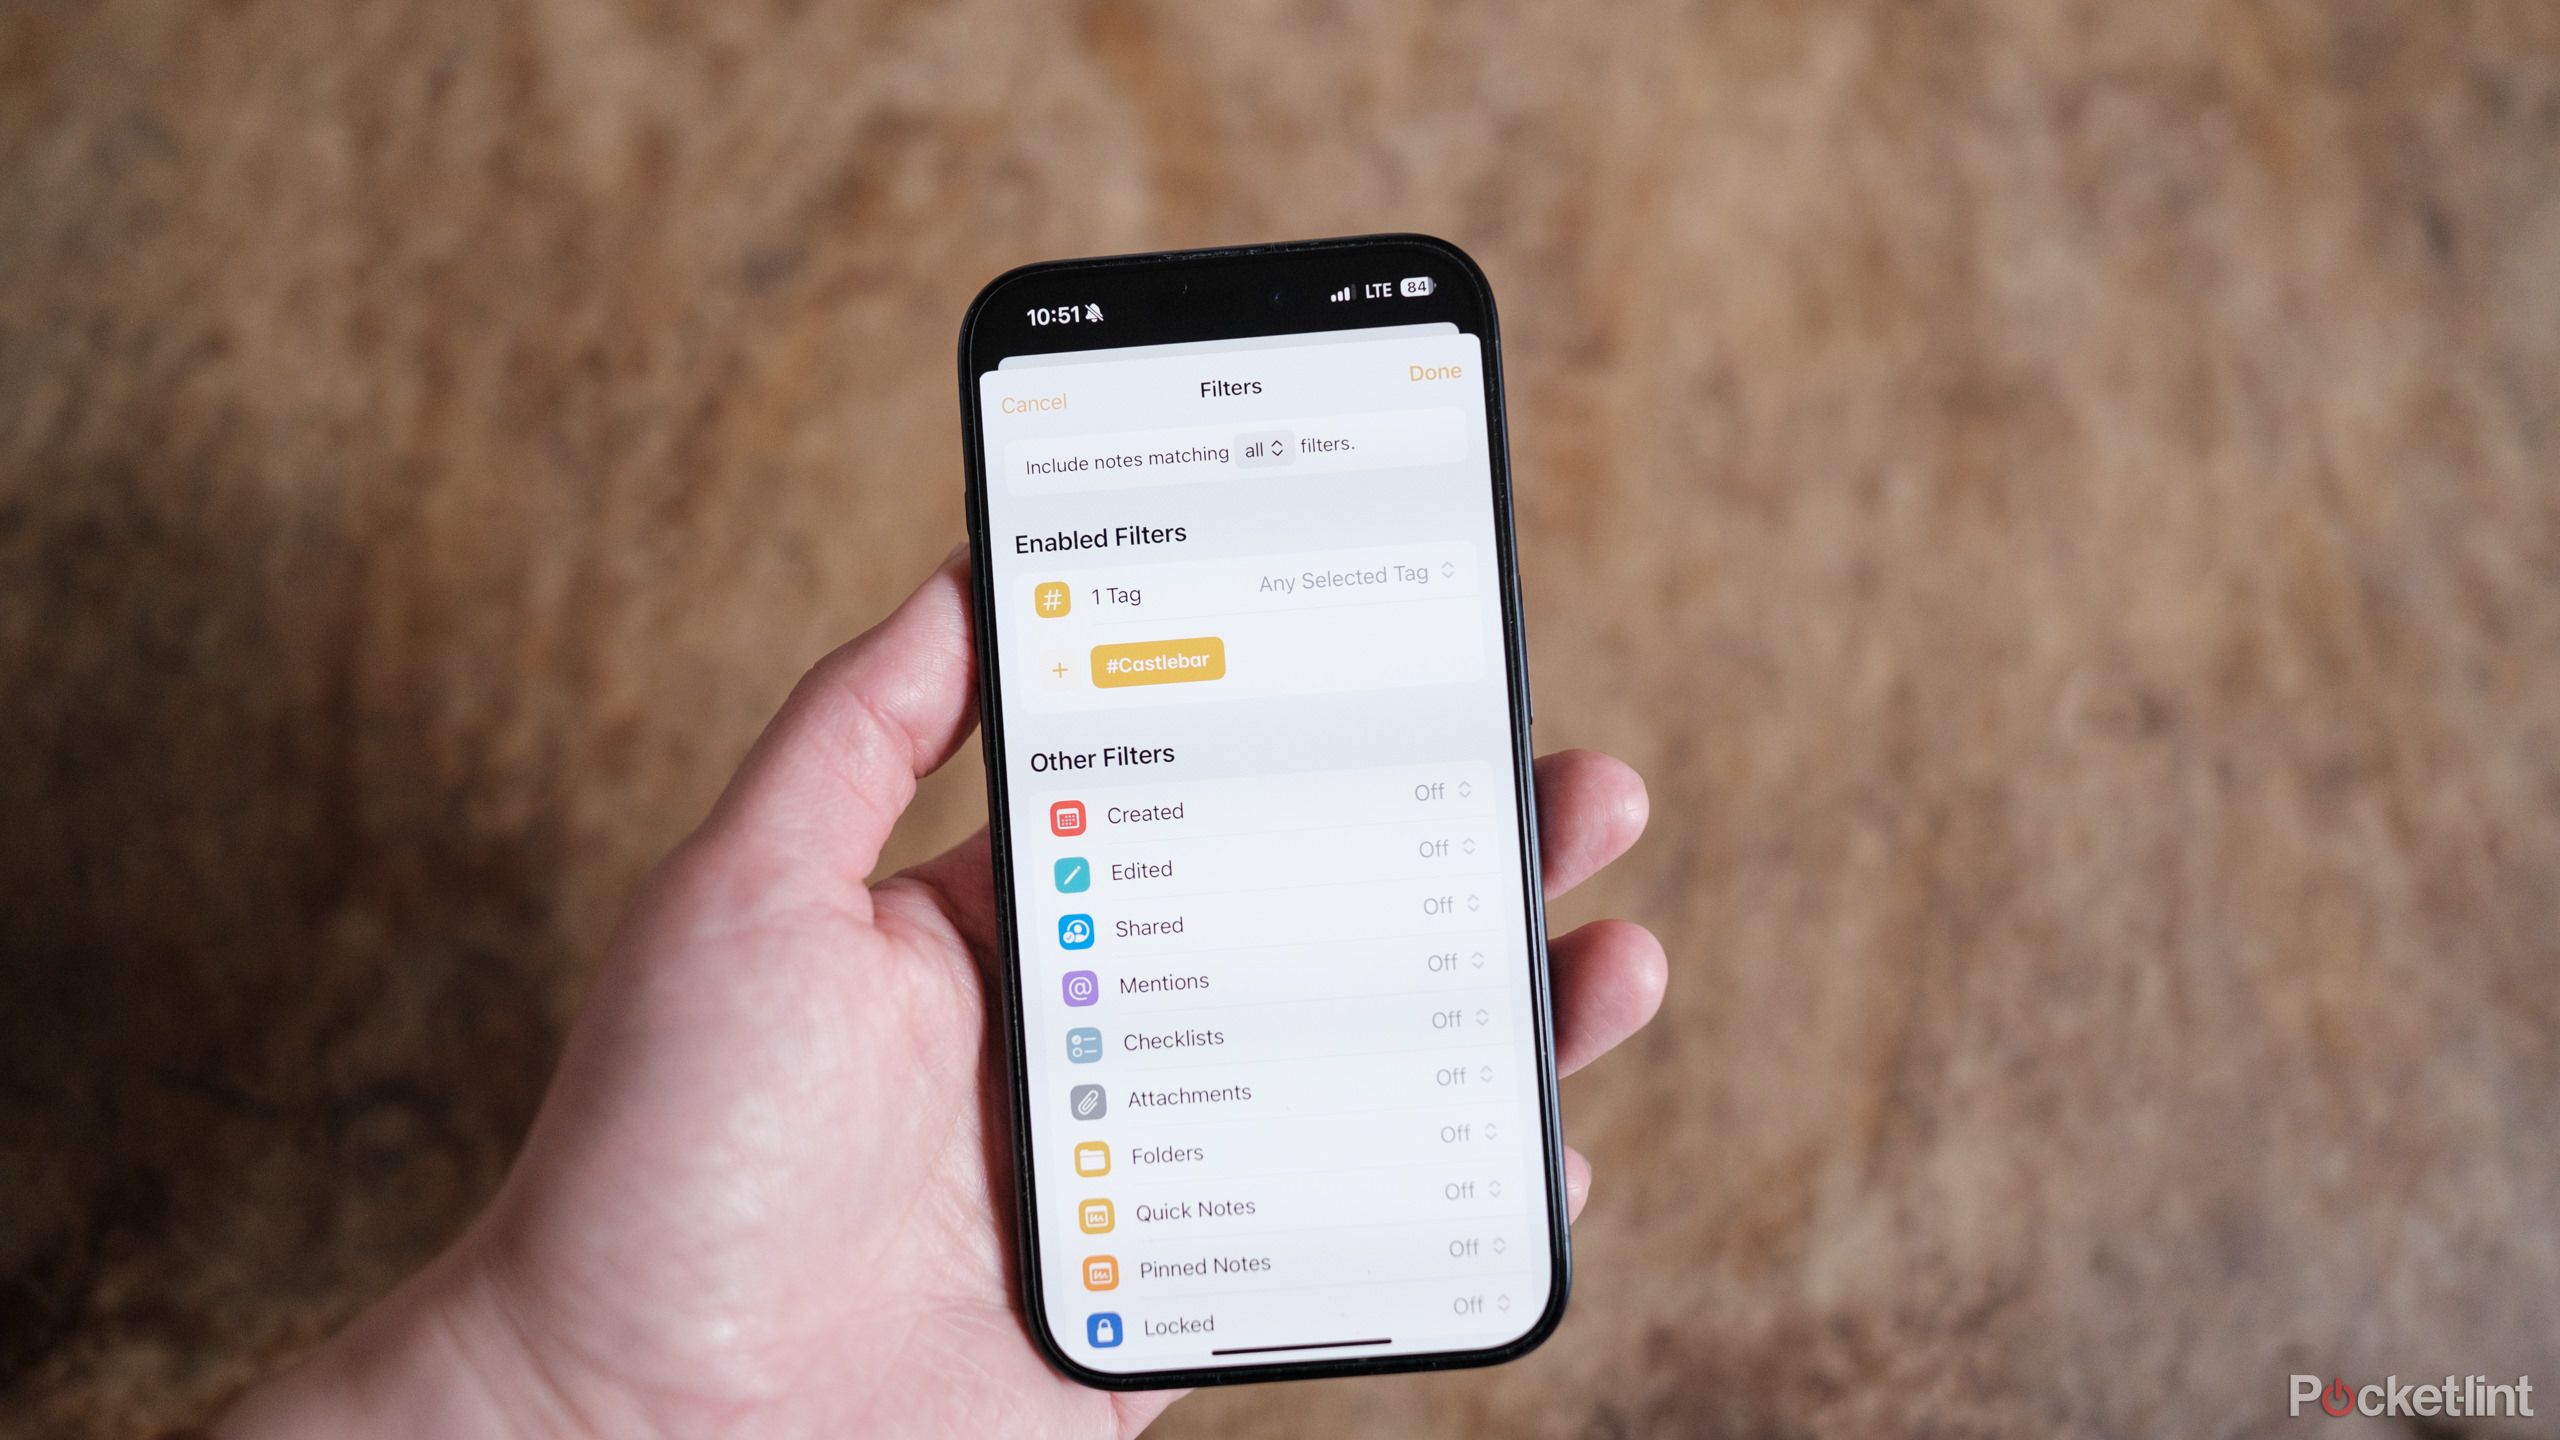
- On the next screen, choose the filters you want to use to automatically categorize your notes. For example, you can create a folder of all your notes that are shared with a specific person, or all your checklists, or organize by date. To create folders with hashtags, tap the Off next to Tags, then select Any Select Tag. Tap the plus icon underneath the Tags filter and type the hashtag you want to use.
- Before you finish, check the top where it says “Including notes matching.” If you selected multiple filters, use the dropdown to choose all (to only include notes that meet all of those filters) or any (to include any Notes that match at least one those filters).
- Tap Done on the filter page.
- Tap Done on the New Smart Folder page.

Related
How I managed to organize my overwhelming Google Photos library
There are a few ways Google Photos has made my camera roll less cluttered and more fun to look through.
6 Format your Notes with headlines and even checklists
Stay organized within the note itself using built-in formatting
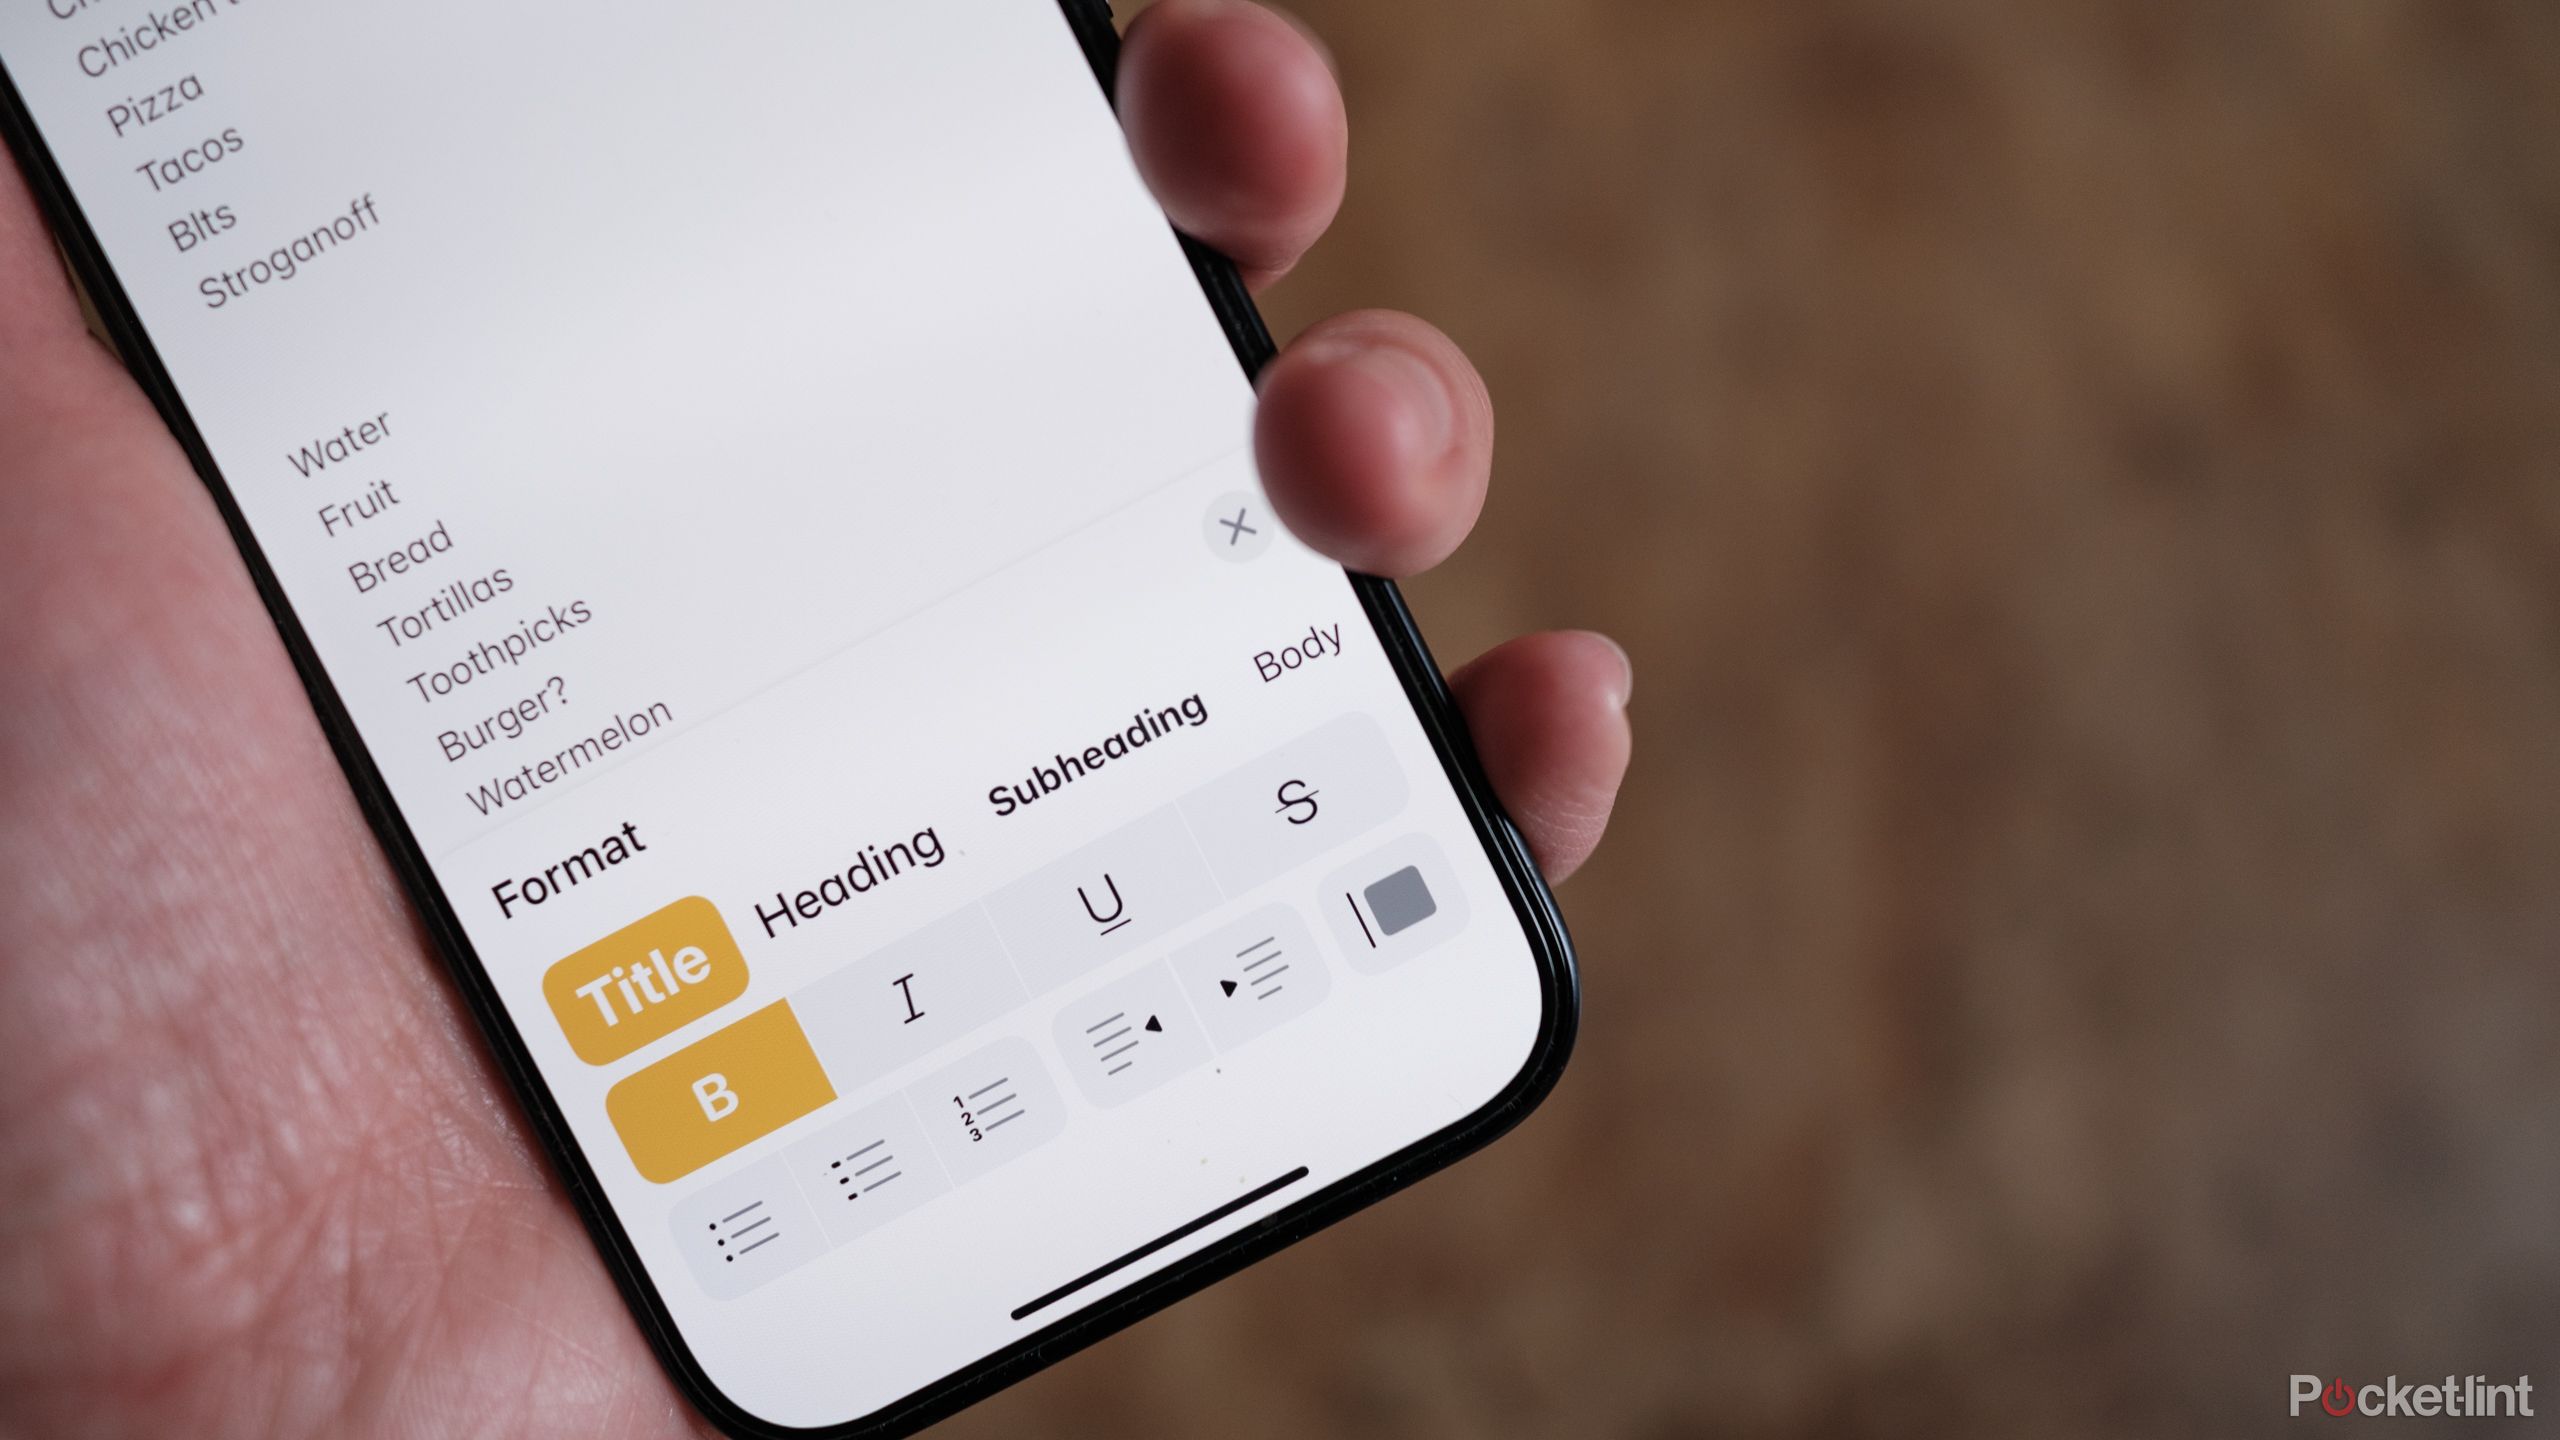
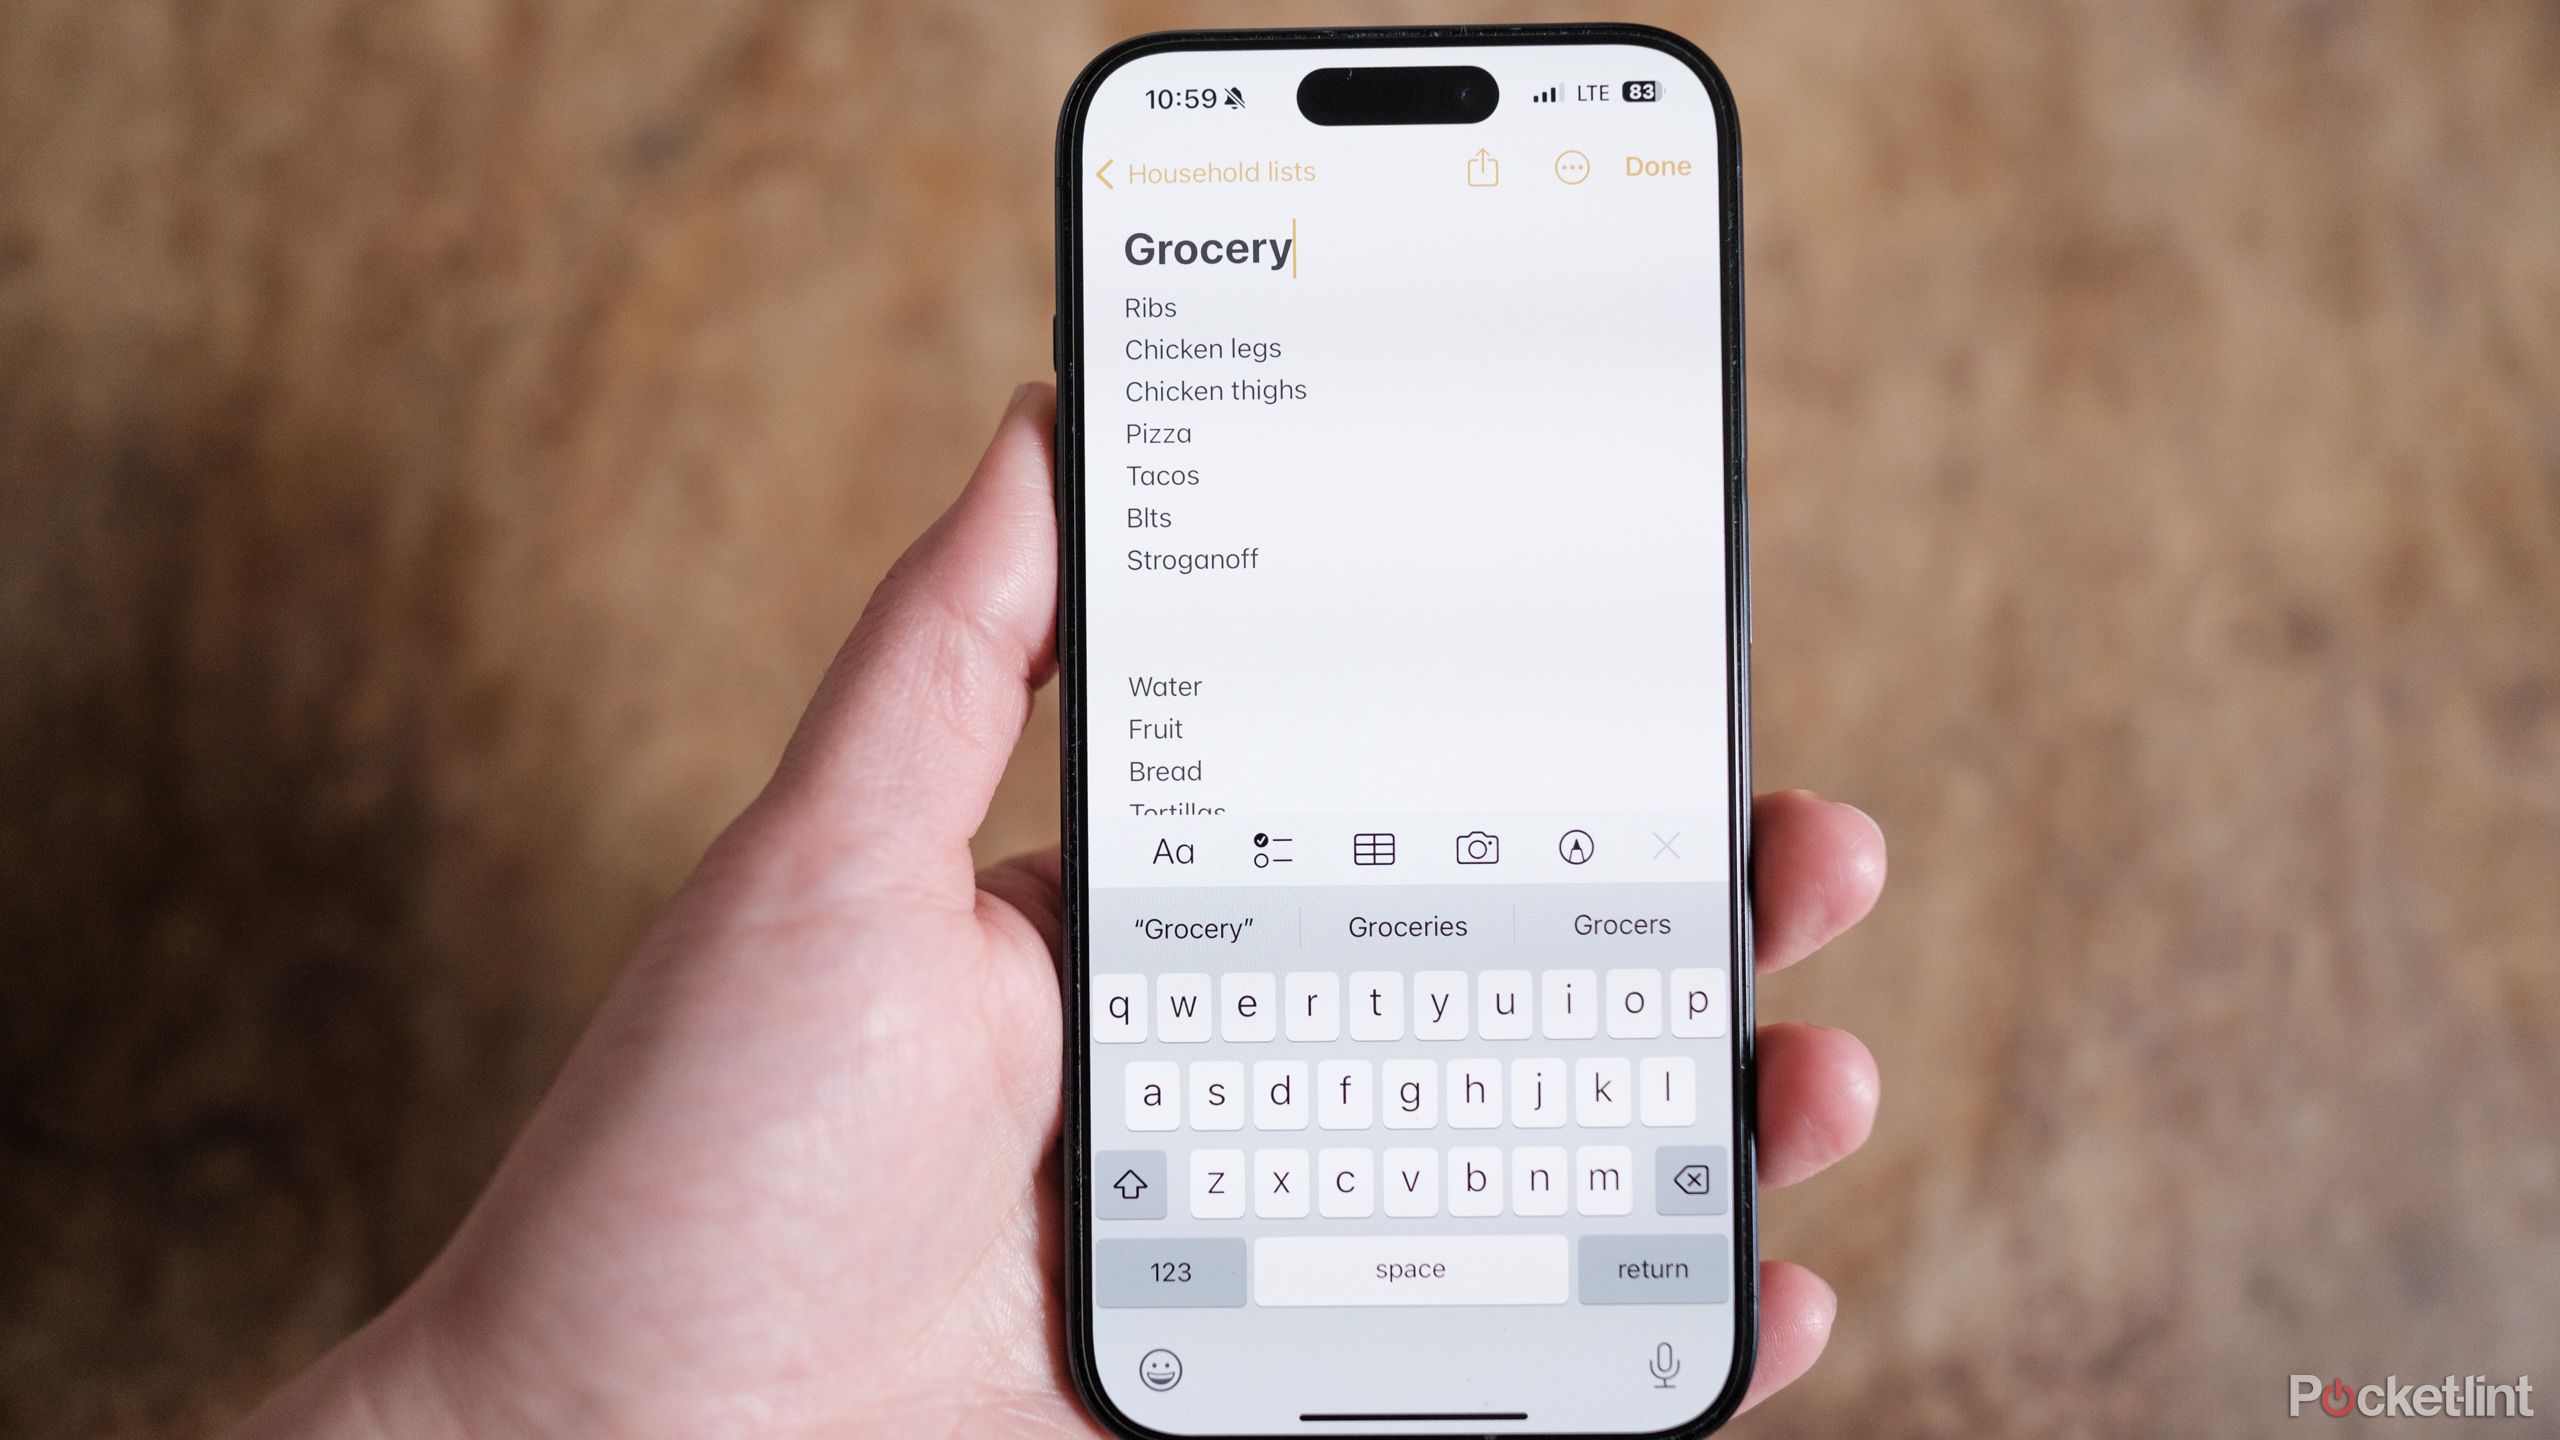
You’ve probably noticed that when you create a new Note, the first thing you start typing becomes a headline. But, you can change that first line to body text, or even add multiple headers and sub-headers or use the checklist tool for Notes to double as a to-do list app.
- Open an existing note or start a new one.
- Tap on the text that you would like to format.
- To turn each item line into a checklist, tap the checklist icon in the lower left corner.
- For other formatting options besides the checklist, select the “Aa” icon above the keyboard.
- Use different icons to convert the text you’ve selected into headings, subheadings, body text, or different types of lists.
- Once you are done formatting, tap the X to go back to the regular keyboard.
0:42
Related
How to change the font on Kindle and which is best for reading?
Kindle readers let you choose from a number of different font styles and change size. Here’s how to make the most of that feature.
7 Use your iPhone camera to scan text, photos, and docs into Notes
Stop copying things by hand when your camera can write it down for you
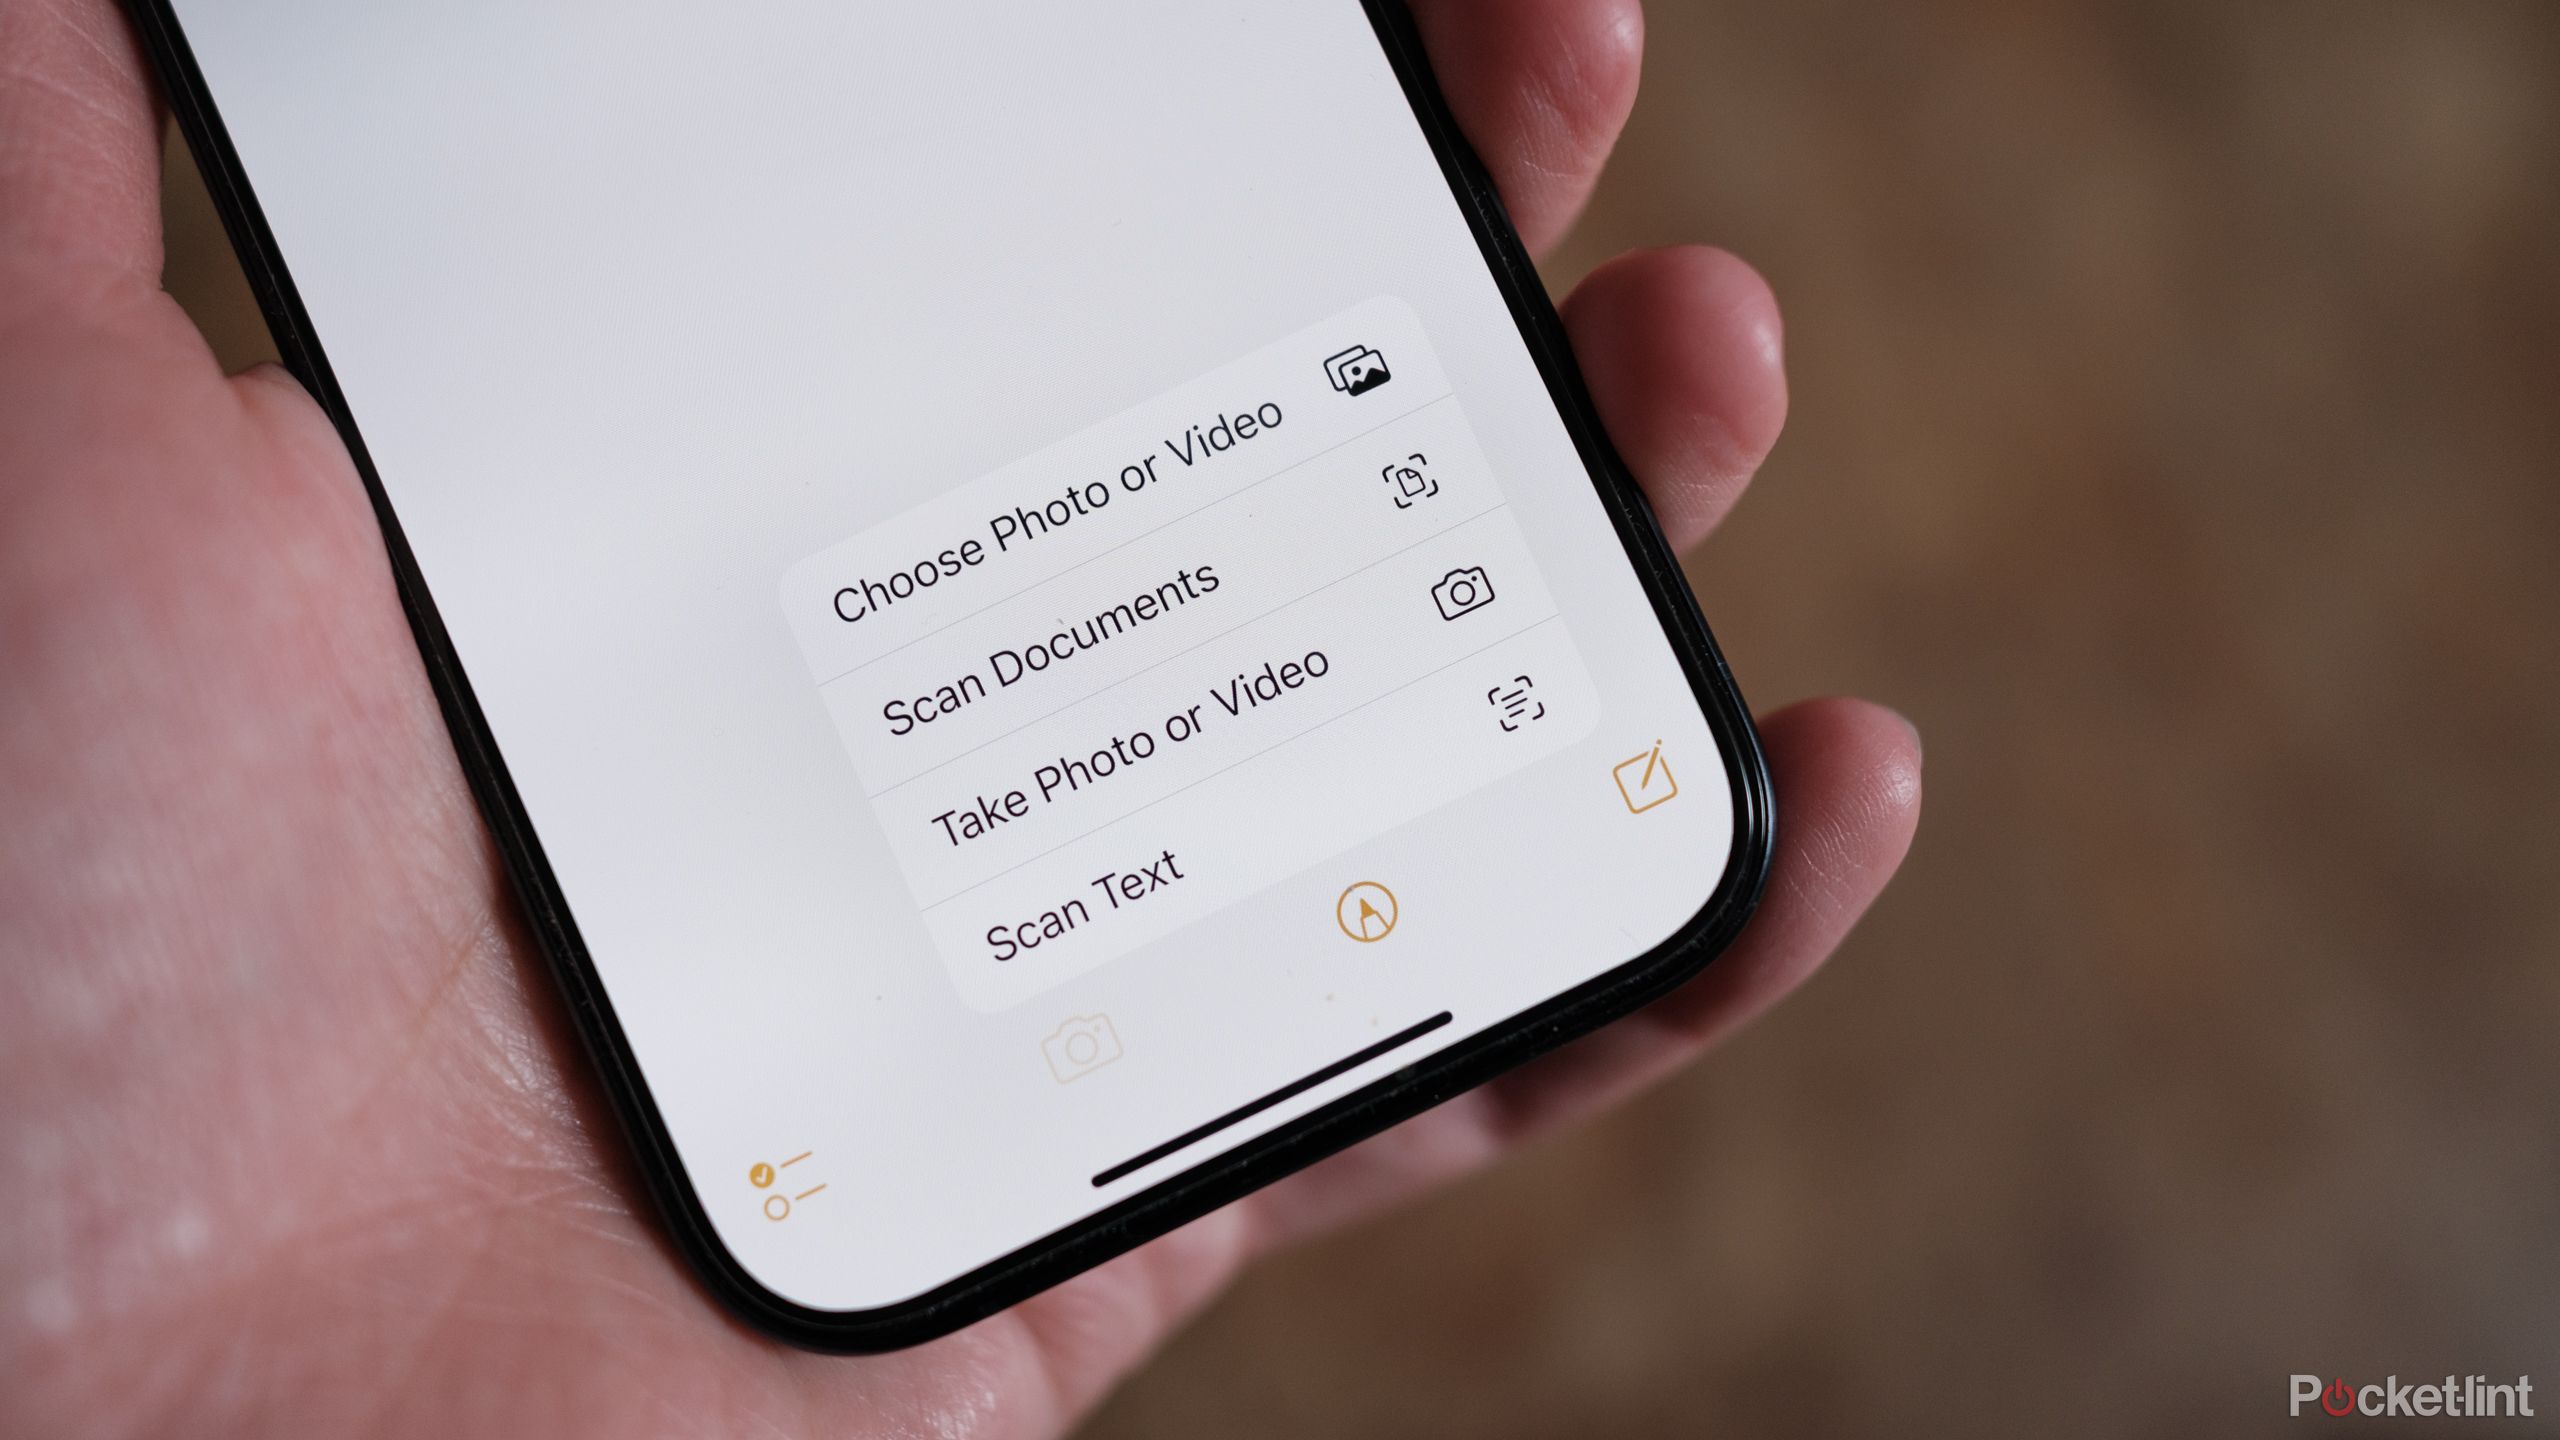
One of the hidden iPhone hacks inside the Camera app is to convert the text you see in real life into text that you can copy, paste, and edit. But, you can also use this hack right inside the Notes app instead of switching between Notes and Camera. Here’s how.
You can also use these steps to add a photo right into the Notes app.
- Open the Notes app.
- Select the note you want to add text to, or create a new one.
- Tap the camera icon.
- Choose Scan Text.
- Hold the camera so the desired text falls within the yellow box. For large amounts of text, you can slowly scan down each page.
- Tap Insert.
- Double-check your scanned text. While the scanning tool is much faster than handwriting in most cases, it can sometimes transpose letters, for example, turning a “d” into an “a” depending on the font of the scanned text.
Related
How to use your iPhone to create a floorplan of your smart home with Alexa Map View
Amazon has begun rolling out Alexa Map View to select iOS users. Here’s how to use the new feature.
8 Hand-write your Notes
The Notes app can turn handwritten Notes into editable text
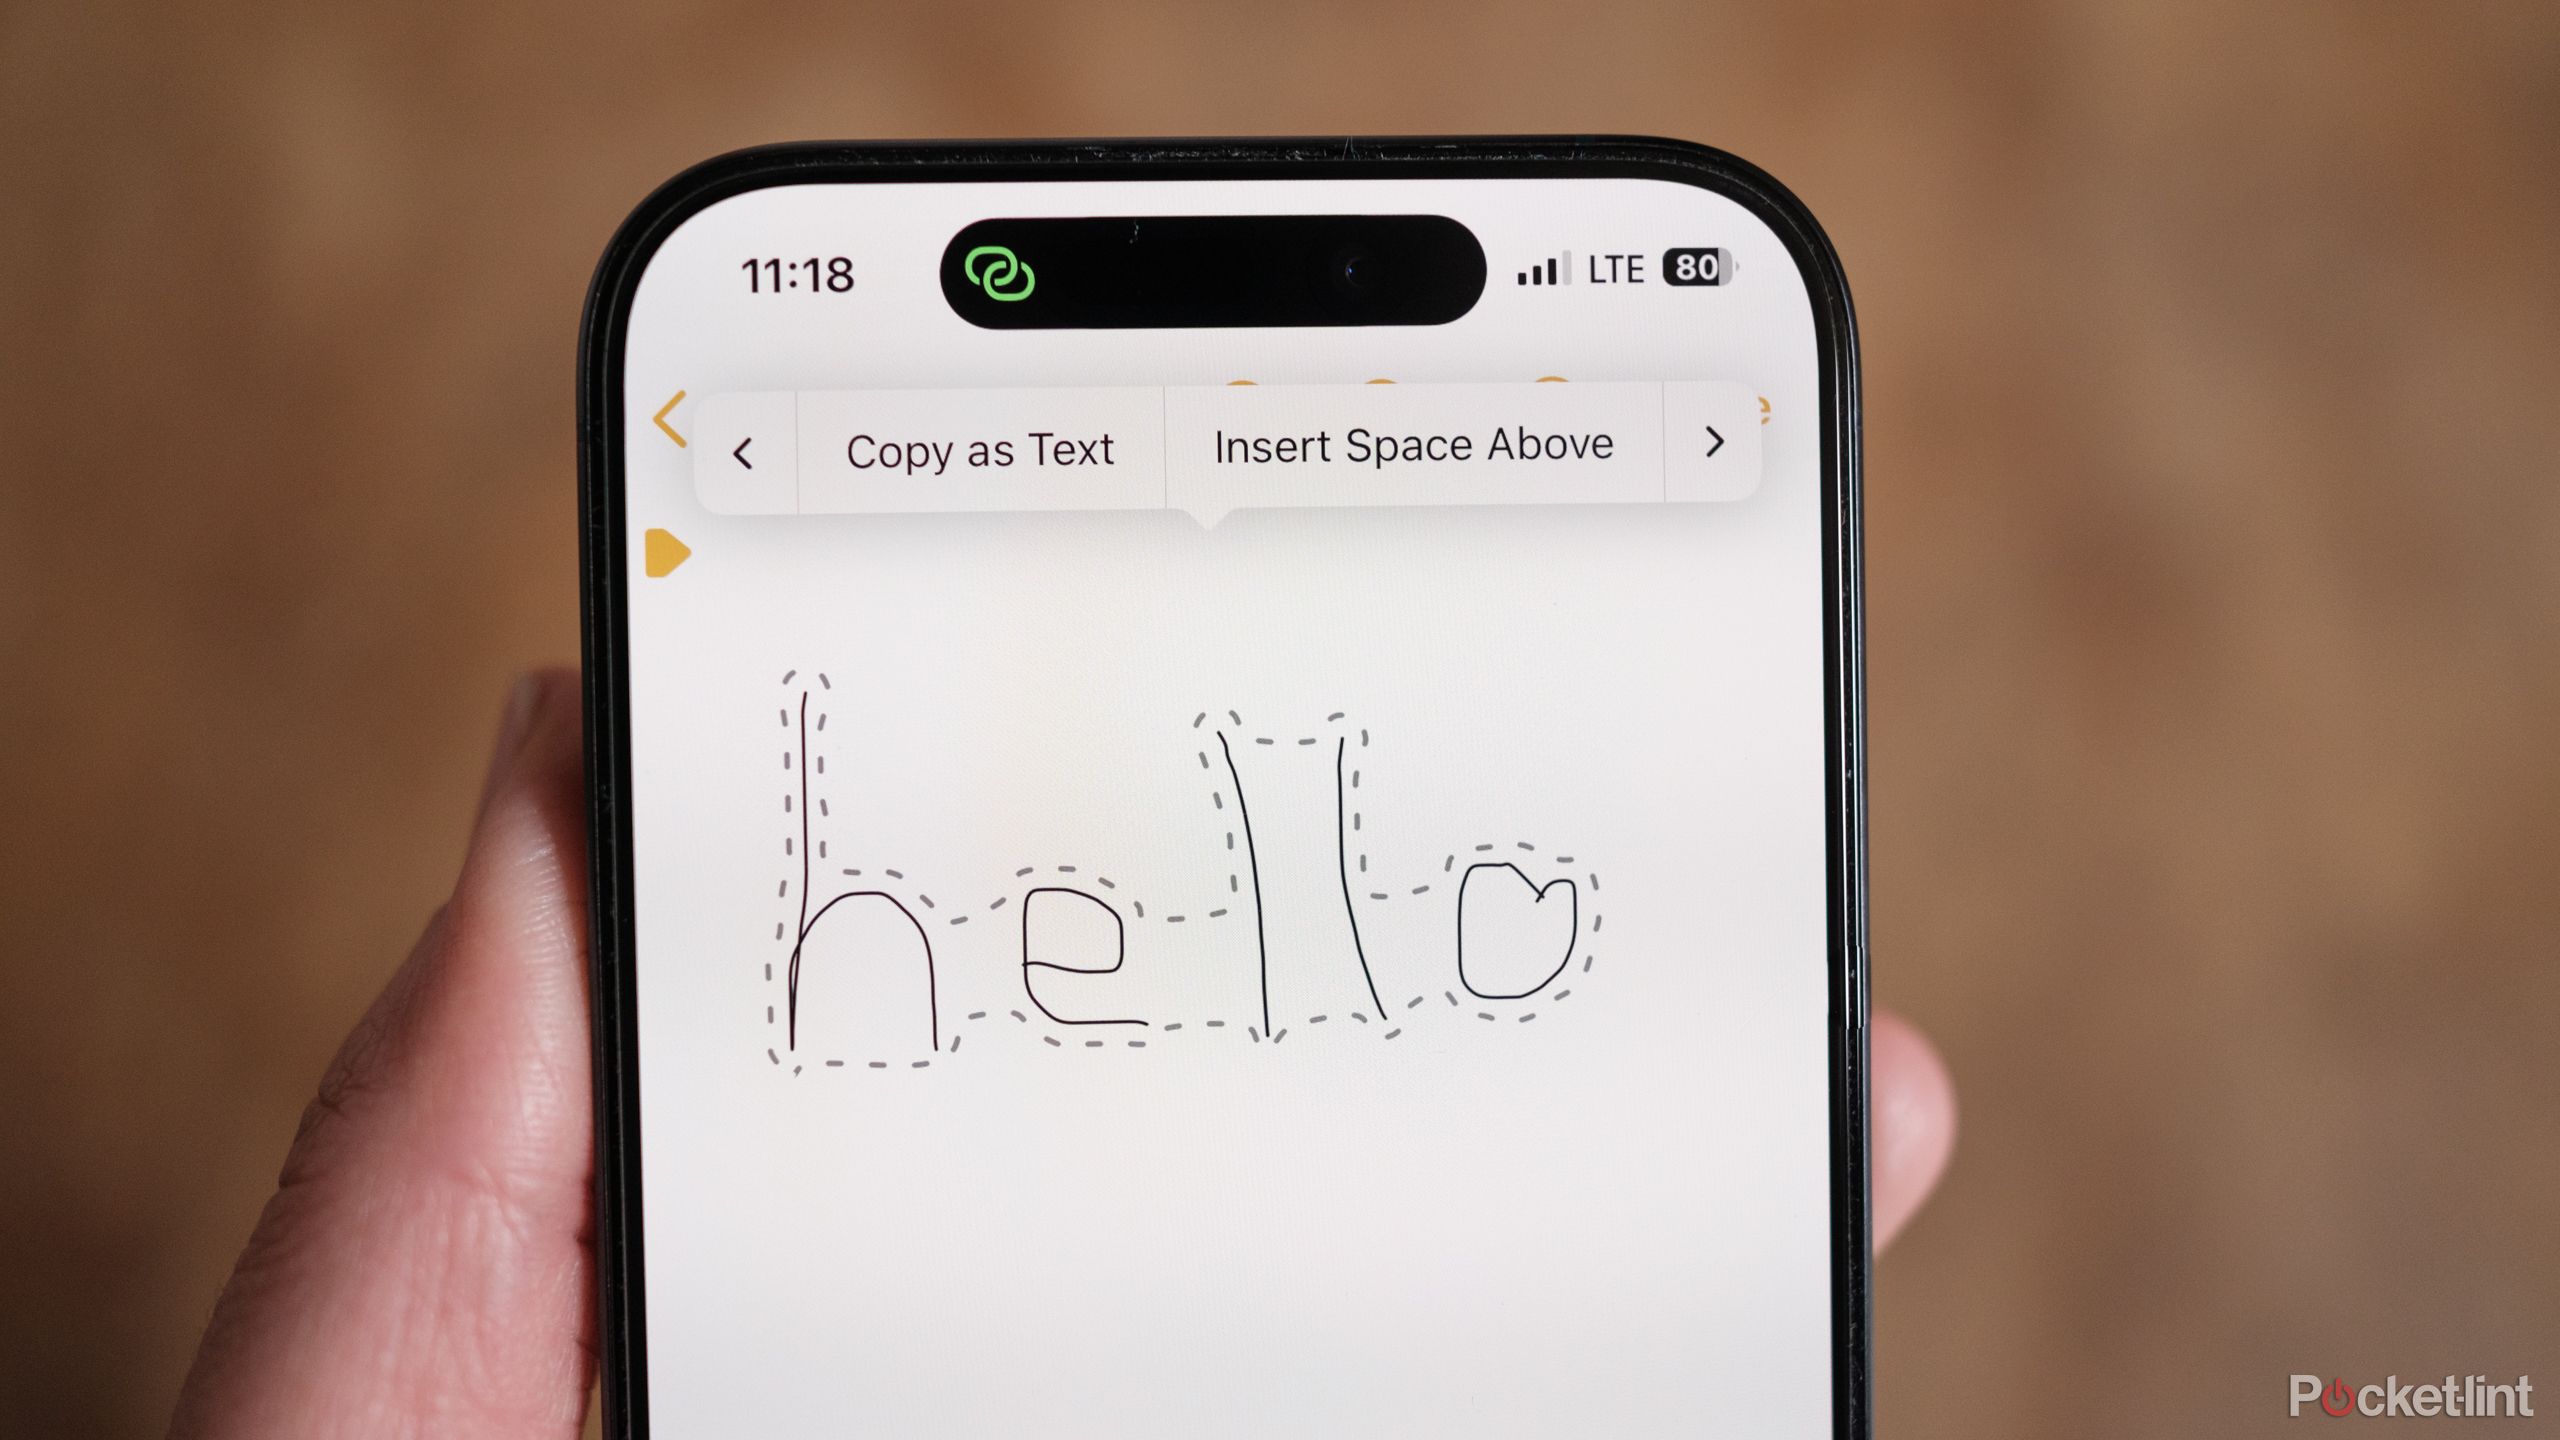
There’s just something different about the act of handwriting a note rather than typing it out. The Apple Note app can convert handwritten text to editable, typed text. This hack works best if you have an iPad and an Apple Pencil, but it works with an iPhone and a finger too.
Use the … menu and select
Lines
and
Grids
to give yourself notebook-like lines to write on.
- Open a note or create a new one.
- Tap the pencil tool. Choose the pen or marker. If you have a compatible model iPad, choose the pen that has an A on it, as this is the tool designed specifically for writing text.
- Write out the desired text with the Apple Pencil or your finger.
- Next, select the lasso tool from the different pen options. It’s the one with the gray and white stripped tip, typically located between the eraser and ruler tools.
- Draw a box around the text with your finger or Apple Pencil, OR double tap one word, OR triple tap one sentence to select the text.
- Tap the highlighted text and choose copy.
- Open a new Note or use the same Note. Tap where you would like to paste the text, then choose Paste. (Or, you can also open a Pages document, email or any other app that accepts pasted text).

Related
9 essential productivity apps I install as soon as I get a new Mac
If you day is draining away while working on your Mac, try these 9 apps to make you infinitely more productive.
9 Export Notes as different file formats
Open in Pages or export as a PDF
While the Notes app is great, sometimes you need that text in another app like Pages. Or, you may want those notes saved as a PDF, so you can save them and preserve all the formatting. Notes has a few built-in tools to export these files quickly.
To export a Note to Pages:
- Open the desired Note.
- Tap the Share icon near the upper right corner (the one with the box and the arrow pointing straight up).
- Select “Open in Pages.”
You can also export your Notes as PDFs, though if you added multiple images by scanning them in using the Scan tool, you may only see the first page after export. To export a Note as a PDF on iOS:
- Open the desired note in the Note app.
- Tap the Share icon (the one with the box and the arrow pointing straight up).
- Choose Markup.
- Add any desired markings (you can skip this step to keep the note as is).
- Tap Done, then Save File to.
- Choose the location you want the PDF saved to.
Related
Best document cameras: Show detailed objects in presentations or video calls
Move on from your transparent projector with one of the top document cams for classrooms, remote teaching and more.
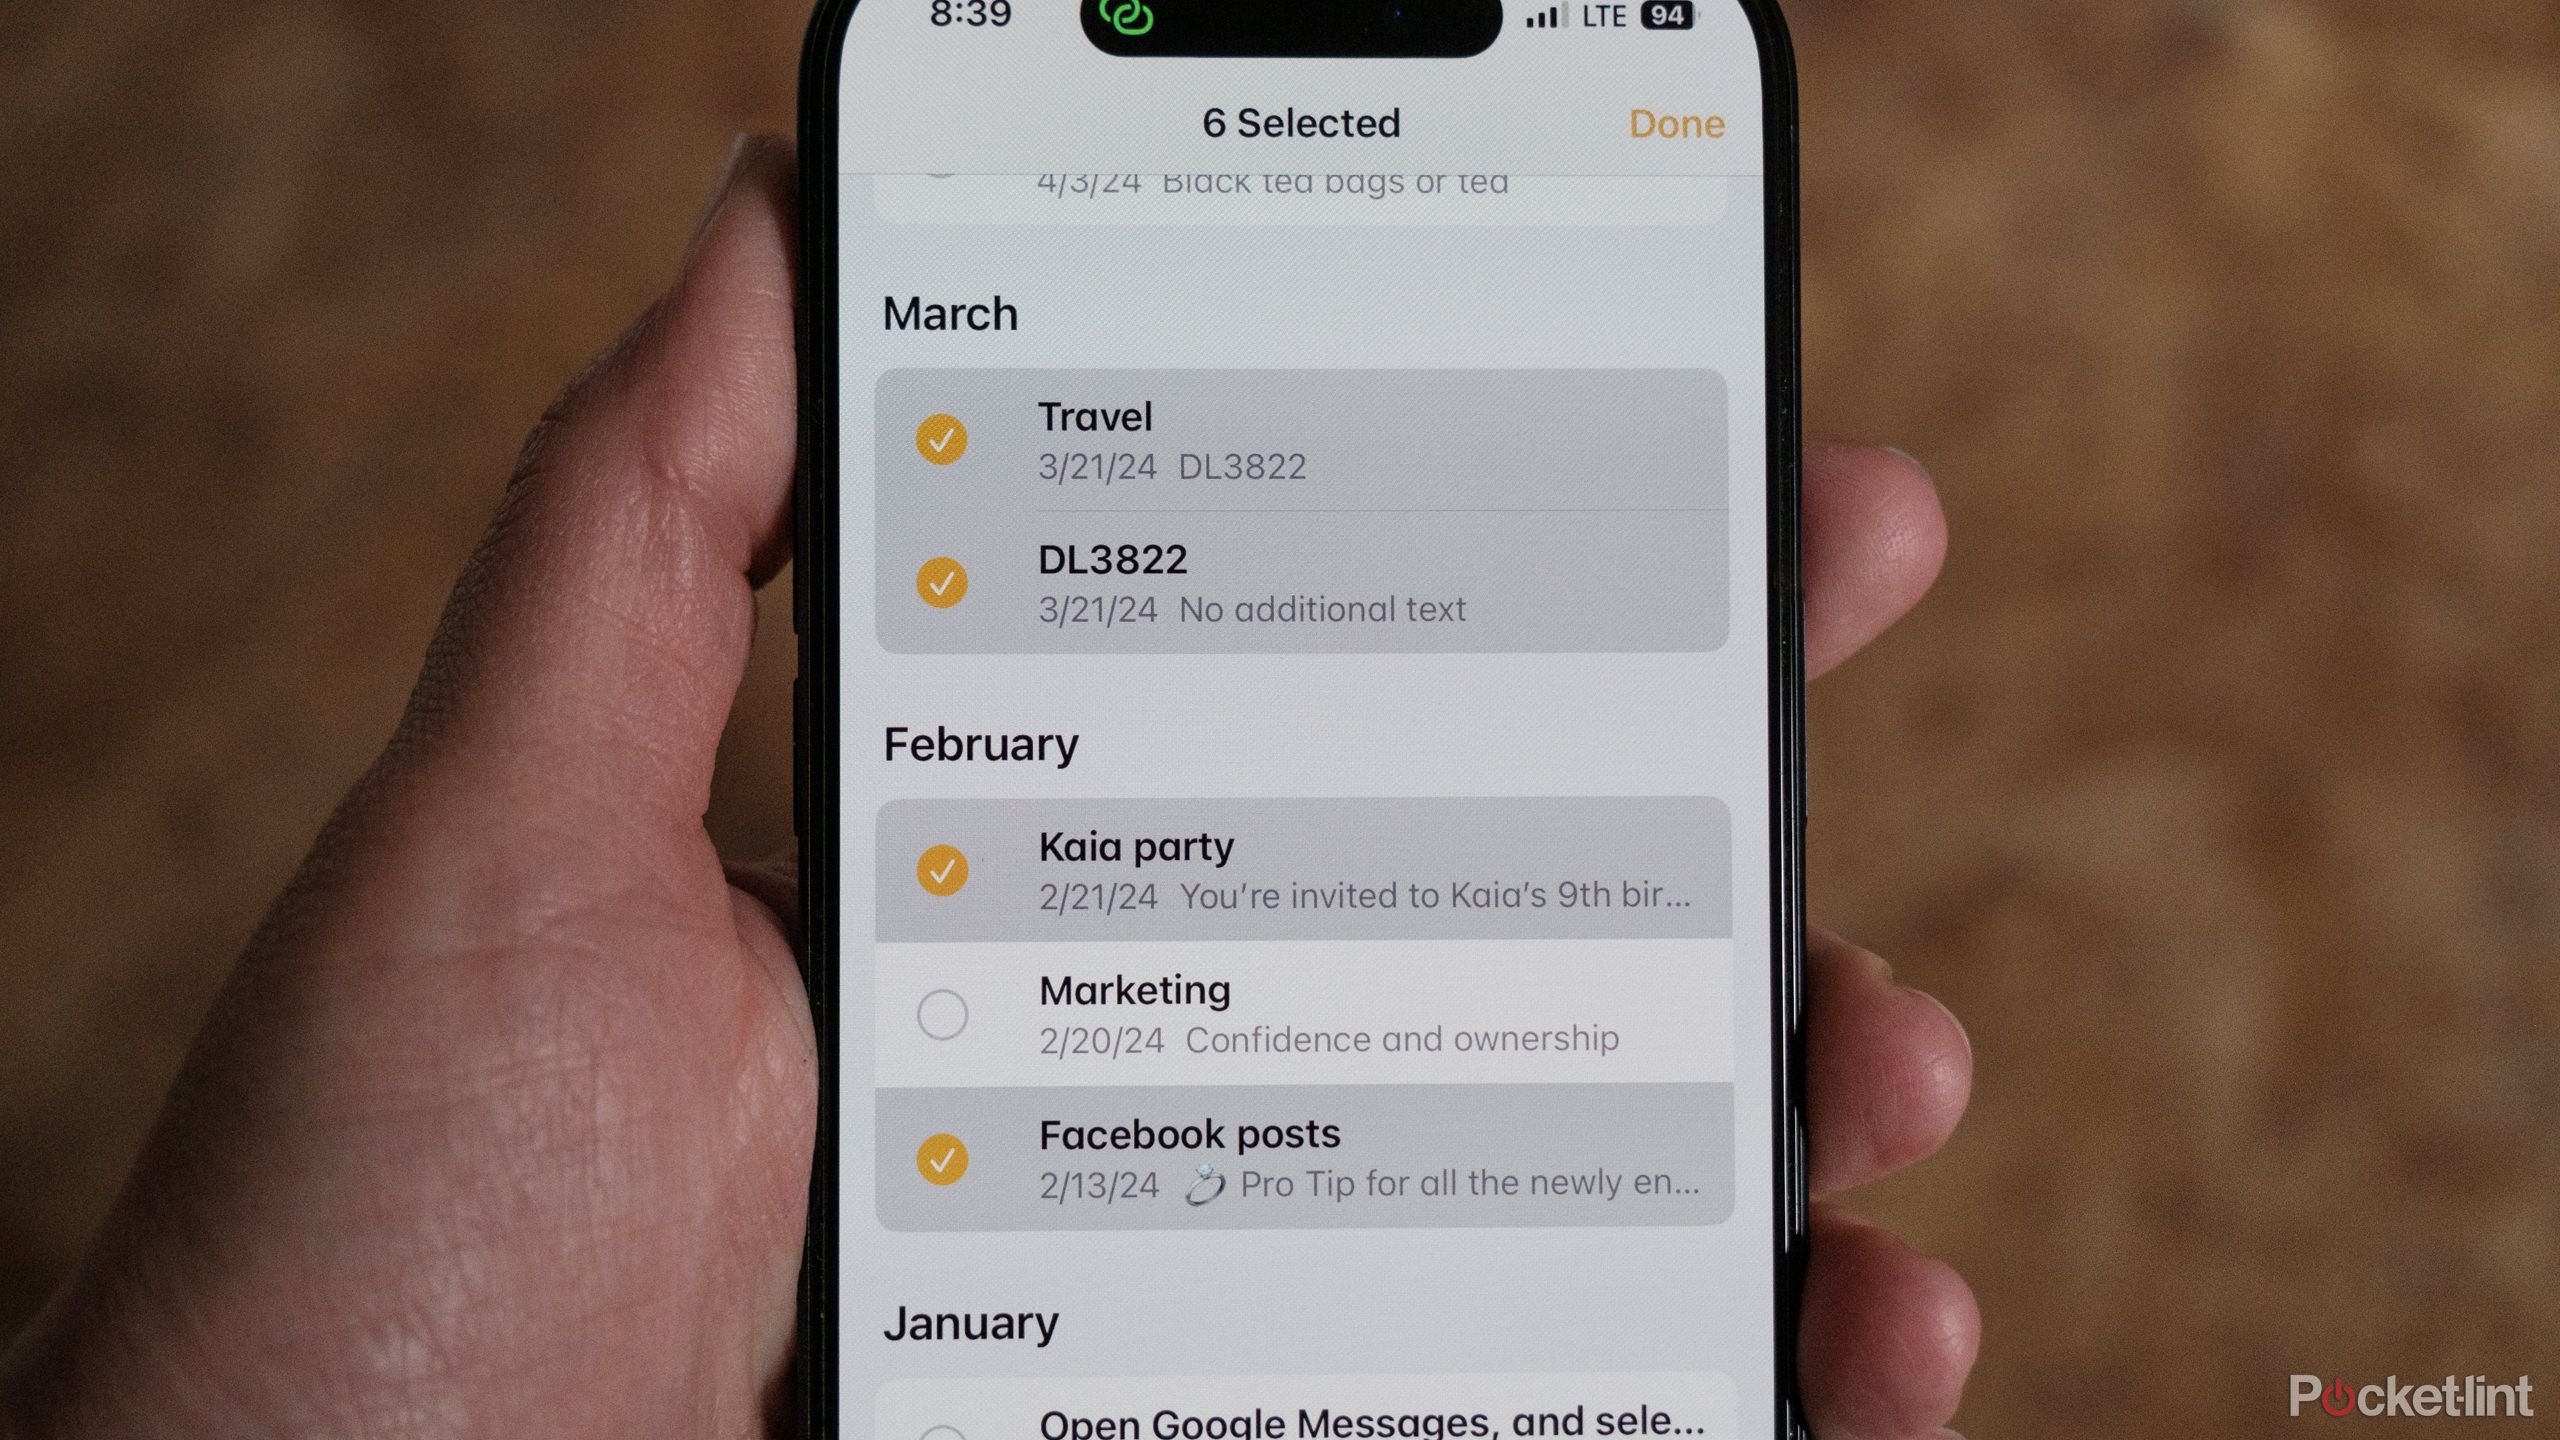
10 Quickly delete multiple Notes using List view
You don’t have to swipe through each one to delete lots of notes at once
Once you’ve learned all the Notes hacks, you’ll likely see some notes floating around that you don’t need anymore. These notes do take up some space on your phone, though text-only files don’t hog a lot of data. If you have iCloud sync turned on, Notes can also use up the limited iCloud space.
To delete multiple notes at once:
- Open the Notes app and navigate to the folder where you have the unneeded files.
- Tap the … menu.
- Choose Select Notes.
- Tap to select all the notes you want to delete.
- Once the notes are selected, tap Delete All.
Related
How to take notes on Kindle Scribe: Create, find, and export your notes
We’ll show you where and how to use the Notes feature on Kindle Scribe to supercharge your eReading experience.
Trending Products

Cooler Master MasterBox Q300L Micro-ATX Tower with Magnetic Design Dust Filter, Transparent Acrylic Side Panel, Adjustable I/O & Fully Ventilated Airflow, Black (MCB-Q300L-KANN-S00)

ASUS TUF Gaming GT301 ZAKU II Edition ATX mid-Tower Compact case with Tempered Glass Side Panel, Honeycomb Front Panel…

ASUS TUF Gaming GT501 Mid-Tower Computer Case for up to EATX Motherboards with USB 3.0 Front Panel Cases GT501/GRY/WITH Handle

be quiet! Pure Base 500DX ATX Mid Tower PC case | ARGB | 3 Pre-Installed Pure Wings 2 Fans | Tempered Glass Window | Black | BGW37

ASUS ROG Strix Helios GX601 White Edition RGB Mid-Tower Computer Case for ATX/EATX Motherboards with tempered glass, aluminum frame, GPU braces, 420mm radiator support and Aura Sync

CORSAIR 7000D AIRFLOW Full-Tower ATX PC Case – High-Airflow Front Panel – Spacious Interior – Easy Cable Management – 3x 140mm AirGuide Fans with PWM Repeater Included – Black


